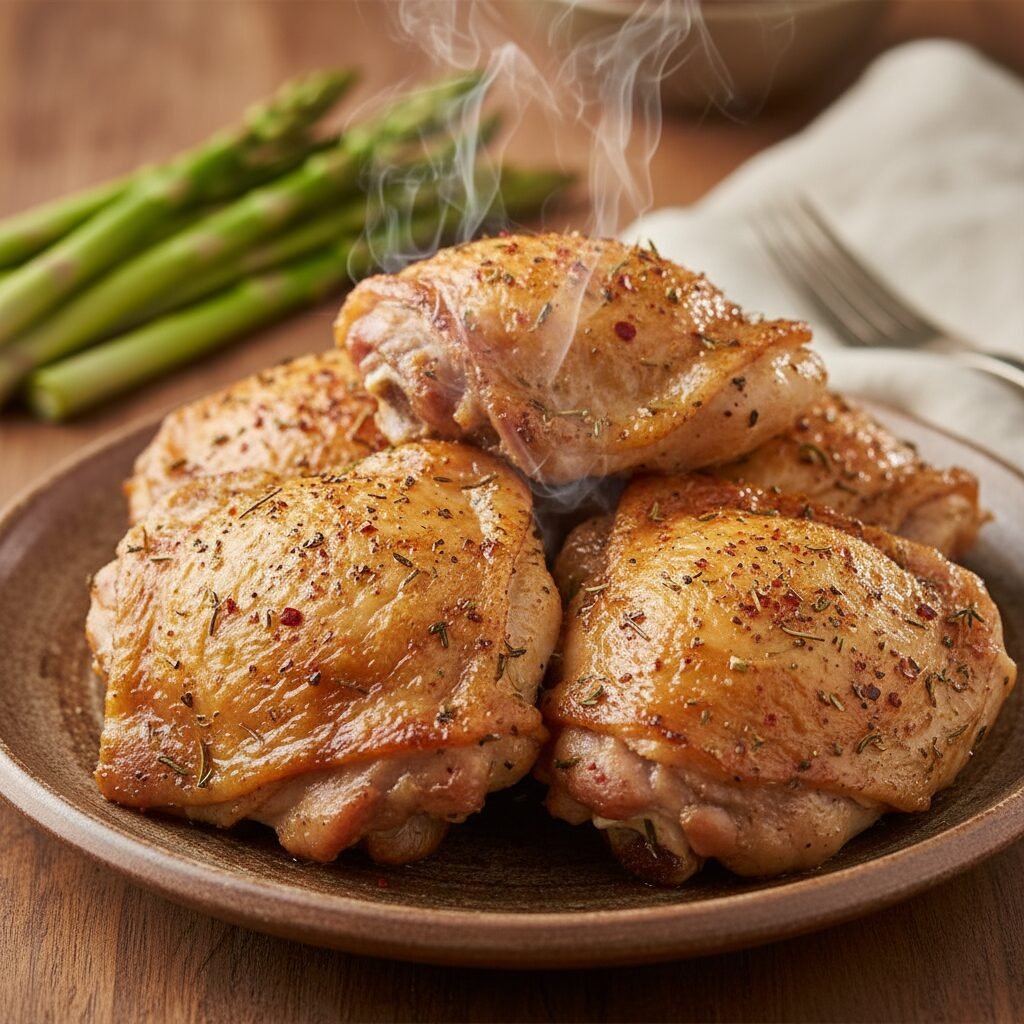
Air Fryer Chicken Thighs
Say goodbye to dry chicken and hello to the ultimate weeknight dinner hack! These Air Fryer Chicken Thighs are incredibly crispy on the outside, juicy on the inside, and ready faster than you can order takeout.
5 minutes
22 minutes
27 minutes
4 servings
Dinner
Air Fryer
American
Gluten Free
Hey there, busy mamas! Let’s have a little heart-to-heart about the 5:00 PM dinner panic. You know the one—where the kids are asking for snacks, the laundry is piling up, and you realize you haven’t even thought about what to feed the troops. We have all been there! That is exactly why I am absolutely obsessed with this Air Fryer Chicken Thighs recipe. It is quite possibly the single most reliable protein recipe in my arsenal, and today, I am sharing all my secrets with you.
If you have been following my blog for a while, you know I love my air fryer. It’s not just a trend; it is a lifestyle for us moms who need healthy meals on the table fast. While boneless skinless chicken breasts often get all the glory for being ‘healthy,’ let’s be honest—they can get dry and boring pretty quickly. Enter the chicken thigh. It is affordable, forgiving (it’s hard to overcook!), and packed with flavor. But the real magic happens when you pop them in the air fryer.
We are talking about skin that shatters when you bite into it, sounding just like deep-fried chicken, but without the gallon of oil and the heavy grease. The meat stays incredibly succulent and tender, pulling away from the bone with zero effort. Plus, the seasoning blend I use is a pantry staple mix that you probably already have on hand. Whether you are doing Keto, Whole30, or just trying to feed picky toddlers who only want ‘crunchy chicken,’ this recipe is a total winner. So, grab your air fryer basket, and let’s make some magic happen!
History & Origins
While the concept of frying chicken dates back centuries—with roots in Scottish frying techniques and West African seasoning traditions converging in the American South—the method of air frying is a relatively new kid on the block. The modern air fryer was introduced in 2010, revolutionizing home cooking by using rapid air technology to mimic the crispiness of deep frying.
However, chicken thighs themselves have been a culinary staple for generations. Historically, dark meat was often preferred in many cultures for its rich flavor and higher fat content, which kept the meat moist during long stews or roasts. In recent decades, the diet culture of the 80s and 90s pushed us toward lean white meat, leaving the humble thigh behind. But as we have learned more about the benefits of healthy fats and the importance of satiety, chicken thighs have made a massive comeback in family kitchens. This recipe marries the traditional comfort of roasted chicken with the modern convenience of convection technology, giving us the best of both worlds: nostalgic flavor with 21st-century speed.
Why This Recipe Works
You might be wondering, "Why is the air fryer better than my oven for chicken thighs?" It all comes down to science, specifically convection heat transfer and the Maillard reaction. An air fryer is essentially a powerful, compact convection oven. It circulates super-heated air around the food at high speeds. Because the cooking chamber is small, the heat is more intense and direct than a standard oven.
This rapid air circulation does two incredible things for chicken thighs:
- Fat Rendering: Chicken thighs have a layer of fat under the skin. The high-velocity heat renders this fat quickly, essentially frying the skin in its own natural juices. This creates that irresistible golden-brown crunch without needing to submerge the bird in oil.
- Moisture Retention: Because the cooking time is significantly shorter than roasting (20 minutes vs. 45 minutes), the meat doesn’t have time to dry out. The bone acts as an insulator, conducting heat gently through the center of the meat, ensuring it cooks evenly while staying juicy.
Furthermore, the dry rub contains salt, which draws moisture to the surface initially, dissolving the spices, and then reabsorbs into the meat (a quick dry-brine effect), seasoning it throughout while drying out the surface skin for maximum crispiness.
Why You’ll Love This Recipe
- ✓Ready in under 25 minutes
- ✓Keto, Low-Carb, and Gluten-Free friendly
- ✓Uses simple pantry staple spices
- ✓Crispier skin than oven-roasting
- ✓Budget-friendly cut of meat
- ✓Minimal cleanup required
Equipment You’ll Need
- ✓Air Fryer (Basket style or Oven style)
- ✓Small mixing bowl
- ✓Kitchen Tongs
- ✓Meat Thermometer (Instant-read)
- ✓Paper Towels
- ✓Plate or Cutting Board
Ingredients
- ✓4 bone-in, skin-on chicken thighs (approx. 1.5 – 2 lbs total)
- ✓1 tablespoon olive oil or avocado oil
- ✓1 teaspoon garlic powder
- ✓1 teaspoon onion powder
- ✓1 teaspoon smoked paprika (regular works too, but smoked adds depth!)
- ✓1/2 teaspoon dried oregano or Italian seasoning
- ✓1/2 teaspoon kosher salt
- ✓1/4 teaspoon black pepper
- ✓Optional: 1/4 teaspoon cayenne pepper (if you like a little kick!)
Instructions
- Step 1: Prep the Chicken. Remove your chicken thighs from the packaging. This is the most critical step: use paper towels to pat the chicken skin thoroughly dry. Moisture is the enemy of crispiness! If the skin is wet, it will steam instead of crisp.
- Step 2: Mix the Rub. In a small bowl, combine the smoked paprika, garlic powder, onion powder, oregano, salt, and pepper. Stir it all together until well mixed.
- Step 3: Season. Drizzle the olive oil over the chicken thighs, rubbing it in with your hands to ensure they are evenly coated. Then, sprinkle the spice mixture generously over all sides of the chicken, ensuring you get under any loose folds of skin.
- Step 4: Preheat (Optional). I usually preheat my air fryer to 380°F (193°C) for about 3 minutes. While not strictly necessary for all models, a hot basket helps sear the skin immediately.
- Step 5: First Cook Cycle. Place the chicken thighs in the air fryer basket in a single layer, skin-side down. Do not overlap them! Air needs to circulate. Cook at 380°F for 12 minutes.
- Step 6: Flip and Finish. Open the basket and carefully flip the chicken thighs so they are skin-side up. Increase the temperature to 400°F (200°C). Cook for another 8-10 minutes. This blast of higher heat at the end is what guarantees that shattering crisp skin.
- Step 7: Check Temperature. Use your instant-read meat thermometer to check the thickest part of the meat (avoiding the bone). Chicken is safe at 165°F, but for thighs, I actually prefer cooking them to 175°F-180°F. Unlike breasts, thighs get more tender at higher temps as the connective tissue breaks down.
- Step 8: Rest and Serve. Remove the chicken from the air fryer and let it rest on a plate for 5 minutes before serving. This allows the juices to redistribute so they don’t run out when you cut into it.
Expert Cooking Tips
- ✓Pat it DRY: I cannot stress this enough. If you want that crunch, the skin must be bone dry before adding oil.
- ✓Don’t Overcrowd: Cook in batches if you have a small air fryer. If the chicken pieces are touching, the sides will be soggy.
- ✓Higher Temp for Thighs: While chicken breasts dry out past 165°F, dark meat is actually better closer to 175°F or 180°F because the collagen melts into gelatin, making the meat silky.
- ✓Baking Powder Hack: For extra-extra crispy skin (like fried chicken), mix 1/2 teaspoon of aluminum-free baking powder into your spice rub. It changes the pH level of the skin and creates micro-bubbles for crunch!
Substitutions and Variations
No paprika? No problem! This recipe is super versatile. You can swap the spice blend for Lemon Pepper seasoning, a pre-made Cajun blend, or even just simple salt and pepper if you are keeping it basic. If you don’t have olive oil, avocado oil spray works wonderfully and has a high smoke point.
If you only have boneless, skinless chicken thighs, reduce the cooking time. Cook at 380°F for about 12-14 minutes total, flipping halfway through. They won’t have the crispy skin, but the edges will still get delicious!
Common Mistakes to Avoid
The biggest mistake I see moms make is overcrowding the basket. I know we are all in a rush, but if you stack the chicken, it will steam and turn out gray and flabby. Nobody wants flabby chicken! Another common mistake is skipping the resting period. If you cut into the chicken immediately, all those precious juices run out onto the plate, leaving you with dry meat. Give it that 5 minutes—it makes a huge difference!
Serving Suggestions
This dish is a chameleon and goes with almost anything! For a low-carb dinner, I serve these with roasted asparagus or a big Caesar salad. If you are feeding hungry teenagers, pair it with creamy mashed potatoes or macaroni and cheese. The salty, savory chicken is also amazing shredded off the bone and used in tacos or on top of grain bowls!
Storage and Reheating Tips
To Store: Place leftover chicken in an airtight container in the refrigerator for up to 3-4 days. It is great for meal prep!
To Reheat: Do not microwave it! The skin will get rubbery. Instead, pop it back in the air fryer at 350°F for 3-4 minutes until warmed through and the skin re-crisps.
Nutrition Facts (Estimated)
| Serving Size | 1 thigh |
| Calories | 245 kcal |
| Fat | 16g |
| Saturated Fat | 4g |
| Unsaturated Fat | 0g |
| Trans Fat | 0g |
| Cholesterol | 95mg |
| Sodium | 280mg |
| Carbohydrates | 1g |
| Fiber | 0g |
| Sugar | 0g |
| Protein | 24g |
Frequently Asked Questions
Can I put frozen chicken thighs in the air fryer?
Technically, yes, but for the best texture, I recommend thawing them first. If you must cook from frozen, cook at 360°F for 25-30 minutes, flipping halfway, and seasoning after the ice melts off.
Do I need to flip the chicken?
Yes! Flipping ensures even cooking and allows the skin to get crispy at the end without burning the spices during the longer initial cook time.
Why is my air fryer smoking?
Chicken thighs render a lot of fat. If that fat hits the heating element or pools too much, it can smoke. To prevent this, put a slice of bread or a little water in the bottom drawer (under the basket) to catch the grease.
Can I use aluminum foil in the air fryer?
You can, but I don’t recommend covering the whole bottom. You need airflow for this recipe. If you use foil, poke holes in it or make sure it doesn’t block the side vents.
Is this recipe keto-friendly?
Absolutely! It is high in protein and healthy fats with virtually zero carbs. It is a Keto staple in our house.
How do I know when they are done without a thermometer?
If you poke the thickest part with a knife, the juices should run clear, not pink. However, a cheap instant-read thermometer is the best investment for food safety!
Can I use a marinade instead of a dry rub?
Yes, but wet marinades make it harder to get crispy skin. If you marinate, pat the skin very dry before cooking, even if it means wiping off some marinade from the surface.
What if my chicken thighs are very large?
Some thighs are huge! If yours are over 6-7oz each, you may need to add 3-5 minutes to the cooking time. Always cook to temperature, not just time.
Conclusion
There you have it, friends! The easiest, tastiest way to cook chicken thighs. Once you try this method, I promise you will never want to turn on your big oven for chicken again. It is fast, mess-free, and honestly tastes like a guilty pleasure despite being a wholesome, home-cooked meal.
If you try this recipe, please snap a picture and tag me on Instagram or Pinterest! I love seeing your creations. And don’t forget to leave a comment below letting me know what side dishes you paired with it. Happy cooking!