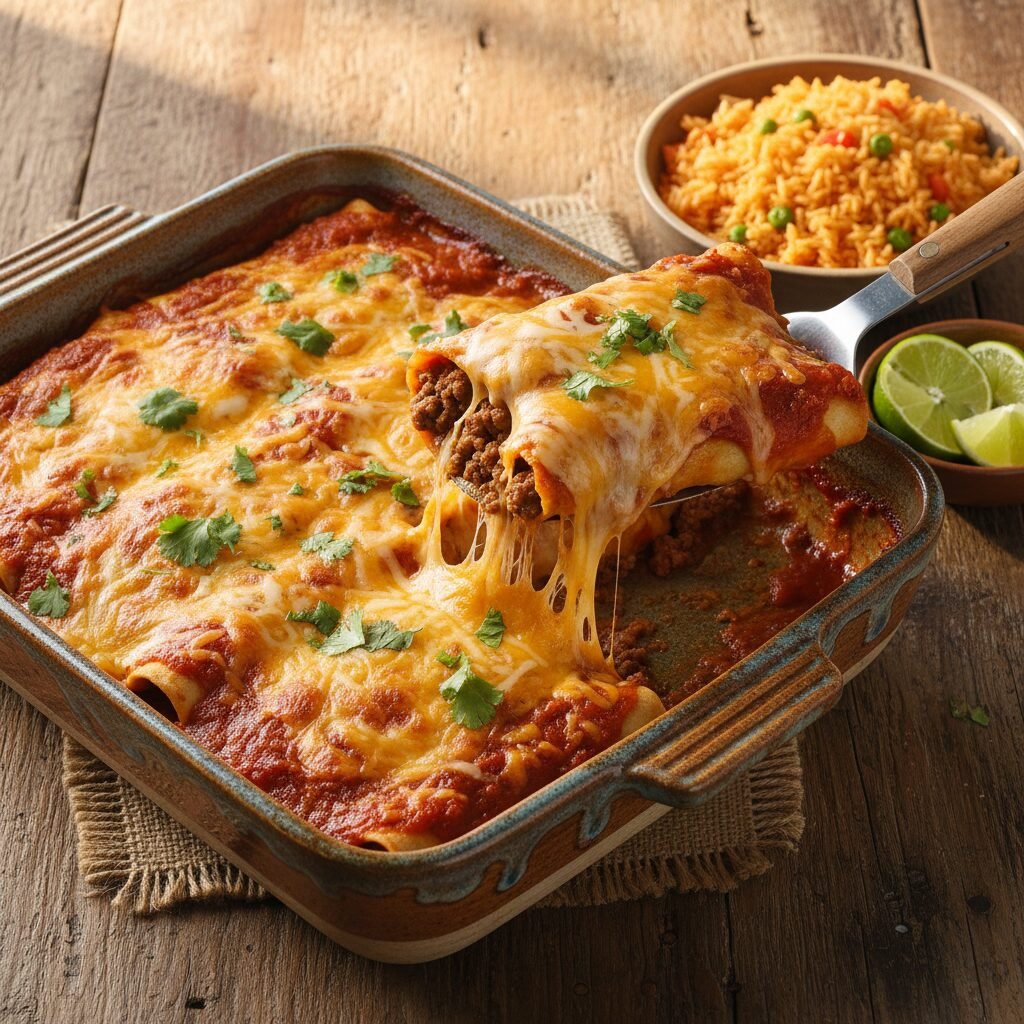
Beef Enchiladas
If you are looking for a dinner ‘win’ that gets the whole family running to the table, this is it! These cheesy, saucy beef enchiladas are the ultimate comfort food hug that comes together in under an hour.
20 minutes
25 minutes
45 minutes
12 Enchiladas (Serves 4-6)
Dinner
Baking
Tex-Mex
Gluten Free
Hey there, sweet friends! Welcome back to my kitchen. Today, we are diving headfirst into one of my absolute all-time favorite comfort foods: Beef Enchiladas. You know those chaotic weeknights where the laundry is piling up, the kids have soccer practice, and you just need a meal that feels like a warm embrace? This is that meal.
There is something magical about a bubbling 9×13 pan coming out of the oven. The smell of cumin and chili powder filling the house, the golden cheese stretching as you serve the first scoop—it is pure joy. I have tweaked this recipe over the years to find the perfect balance of ease and flavor. It is better than our local Mexican restaurant (shh, do not tell them!), and it is budget-friendly too.
Whether you are hosting a casual dinner party or just trying to feed a hungry crew of teenagers, these enchiladas are a total lifesaver. Plus, they freeze beautifully, so you can be a meal-prep queen and save your future self some stress!
History & Origins
While we often think of enchiladas as a staple of Tex-Mex cuisine, their roots go way, way back. We are talking about the times of the Aztecs and Mayans in Mexico! Originally, the concept was simple: corn tortillas wrapped around small fish or meat bites. The word enchilada actually comes from the Spanish word enchilar, which means "to season with chili."
When Spanish conquistadors arrived, they documented feasts featuring these rolled delights. Over centuries, as cultures blended and ingredients migrated across borders, the dish evolved. The cheesy, baked casserole style we know and love in the United States—often called "Tex-Mex" style—became popular in the 20th century, utilizing ground beef, yellow cheese, and plenty of gravy-like sauce. It is a beautiful history of adaptation and flavor!
Why This Recipe Works
So, why is this specific recipe a total knockout? It comes down to the texture and flavor layering. Many home cooks struggle with soggy enchiladas, but the secret lies in briefly warming or lightly frying the tortillas before rolling. This creates a barrier so the sauce does not disintegrate the tortilla immediately.
Secondly, we are seasoning the beef inside the filling, not just relying on the sauce for flavor. By adding sautéed onions, garlic, and a custom spice blend to the meat, every bite is robust and savory. Finally, the combination of sharp Cheddar and creamy Monterey Jack ensures you get that picturesque cheese pull and a depth of flavor that mild cheese alone just cannot provide.
Why You’ll Love This Recipe
- ✓Ready in under an hour for busy school nights
- ✓Freezer-friendly for easy meal prepping
- ✓Customizable spice level for picky eaters
- ✓Uses simple pantry staples you likely have
- ✓Better than takeout and budget-friendly
Equipment You’ll Need
- ✓Large Skillet
- ✓9×13 inch Baking Dish
- ✓Spatula
- ✓Cheese Grater
- ✓Measuring Cups and Spoons
Ingredients
- ✓1.5 lbs Ground Beef (85/15 lean is perfect)
- ✓1 medium White Onion, diced finely
- ✓2 cloves Garlic, minced
- ✓2 cups Red Enchilada Sauce (homemade or your favorite canned brand)
- ✓1 (4 oz) can Diced Green Chiles (mild)
- ✓1 tbsp Taco Seasoning (cumin, chili powder, paprika, salt)
- ✓12 Corn Tortillas (or flour if you prefer, see notes)
- ✓3 cups Shredded Cheese (Mix of Sharp Cheddar and Monterey Jack)
- ✓Cooking Oil (vegetable or canola) for frying tortillas
- ✓Fresh Cilantro and Sour Cream for garnish
Instructions
- Preheat and Prep: Preheat your oven to 375°F (190°C). Lightly grease your 9×13 baking dish with non-stick spray. Set aside.
- Cook the Beef Filling: In a large skillet over medium-high heat, add the ground beef and diced onion. Break up the beef with a wooden spoon as it cooks. Once the meat is browned and onions are soft (about 7-8 minutes), drain any excess grease.
- Season the Meat: Add the minced garlic, diced green chiles, and taco seasoning to the skillet. Stir and cook for 1 minute until fragrant. Pour in 1/2 cup of the enchilada sauce into the meat mixture. Stir to combine and remove from heat. This keeps the filling juicy!
- Prepare the Tortillas: This step is crucial! Heat a small amount of oil in a separate small skillet. Briefly flash-fry each tortilla for about 10 seconds per side. You do not want them crispy, just pliable and coated to resist sogginess. Place them on a paper towel-lined plate.
- Assemble Station: Pour about 1/2 cup of enchilada sauce into the bottom of your baking dish to coat it. Take a tortilla, spoon about 1/3 cup of the beef mixture in a line across the center, and sprinkle a little cheese inside.
- Roll and Place: Roll the tortilla tightly around the filling and place it seam-side down in the baking dish. Repeat with the remaining tortillas until the pan is full.
- Sauce and Cheese: Pour the remaining enchilada sauce evenly over the rolled tortillas. Make sure the edges are covered so they do not dry out. Sprinkle the remaining shredded cheese generously over the top.
- Bake: Bake uncovered for 20-25 minutes, or until the cheese is melted and bubbly and the sauce is sizzling around the edges.
- Serve: Let the enchiladas rest for 5-10 minutes before serving (this helps them hold their shape). Top with fresh chopped cilantro, a dollop of sour cream, and enjoy!
Expert Cooking Tips
- ✓Shred Your Own Cheese: I know bagged cheese is easy, but pre-shredded cheese has anti-caking agents that prevent it from melting smoothly. Grab a block and grate it yourself for the best gooey texture!
- ✓Don’t Skip the Tortilla Prep: If you use raw corn tortillas, they will crack when you roll them. Warming them in oil makes them pliable and adds a delicious flavor.
- ✓Sauce Distribution: Be sure to spread sauce on the bottom of the pan to prevent the enchiladas from sticking.
Substitutions and Variations
This recipe is super forgiving! If you are trying to cut back on red meat, you can easily swap the ground beef for ground turkey or even shredded rotisserie chicken. For a vegetarian version, try a mix of black beans, corn, and roasted sweet potatoes.
Regarding tortillas: Traditional enchiladas use corn tortillas, and they hold up best against the sauce. However, if your family prefers flour tortillas, go for it! Just be aware they get softer and slightly doughier in the sauce.
Common Mistakes to Avoid
The biggest mistake I see is cold tortillas. If you try to roll a cold corn tortilla, it will snap in half. You must warm them up! Another common issue is over-saucing. You want them smothered, yes, but not drowning in soup, or they will turn into mush before you can get them on the plate.
Serving Suggestions
I love serving these with a side of fluffy Spanish rice and refried beans for the full restaurant experience. A crisp green salad with avocado and a lime vinaigrette cuts through the richness beautifully. And let’s be honest, a basket of tortilla chips and salsa (and maybe a margarita for Mom!) never hurts!
Storage and Reheating Tips
Fridge: Store leftovers in an airtight container in the refrigerator for up to 3-4 days. Reheat in the microwave or oven until heated through.
Freezer: These are a meal prep dream! You can freeze the unbaked casserole (wrapped tightly in foil) for up to 3 months. Thaw in the fridge overnight before baking. If baking from frozen, you will need to add about 20-30 minutes to the cook time.
Nutrition Facts (Estimated)
| Serving Size | 2 Enchiladas |
| Calories | 520 |
| Fat | 28g |
| Saturated Fat | 14g |
| Unsaturated Fat | 12g |
| Trans Fat | 1g |
| Cholesterol | 85mg |
| Sodium | 890mg |
| Carbohydrates | 38g |
| Fiber | 5g |
| Sugar | 4g |
| Protein | 29g |
Frequently Asked Questions
Why do my corn tortillas fall apart?
Corn tortillas are naturally brittle when cold. The secret is flash-frying them in hot oil for a few seconds or warming them on a griddle before rolling. This makes them pliable and creates a moisture barrier.
Can I use flour tortillas instead?
Yes, absolutely! Flour tortillas are softer and sweeter. They don’t need to be fried first, but they do tend to get soggier than corn tortillas, so serve them immediately after baking.
Is this recipe spicy?
It depends on your enchilada sauce and green chiles. Generally, this is mild to medium. To make it kid-friendly, use ‘Mild’ sauce and skip the green chiles. To spice it up, add jalapeños!
Can I make this ahead of time?
You can assemble the enchiladas earlier in the day and keep them in the fridge. However, to prevent sogginess, I recommend adding the top layer of sauce right before you put them in the oven.
What is the best store-bought enchilada sauce?
I love brands like Las Palmas or Hatch for an authentic flavor. Look for sauces that list chili peppers as the first ingredient.
Can I add vegetables to the filling?
Sure! Diced bell peppers, corn, black beans, or spinach are great additions to bulk up the nutrition.
How do I keep the cheese from sticking to the foil?
If you cover your enchiladas (though I usually bake them uncovered), spray the underside of the foil with non-stick cooking spray before placing it on top.
What kind of cheese is best?
A blend is best! Cheddar gives you that sharp flavor and orange color, while Monterey Jack or Queso Quesadilla provides the supreme meltiness.
Conclusion
There you have it, friends! The only beef enchilada recipe you will ever need. I hope this dish brings as much warmth and happiness to your dinner table as it does to ours. It is messy, cheesy, and absolutely delicious—just the way life should be.
If you try this recipe, please leave a comment below and let me know how it turned out! I love seeing your creations. Don’t forget to pin this to your ‘Dinner Ideas’ board on Pinterest so you can find it later. Happy cooking!