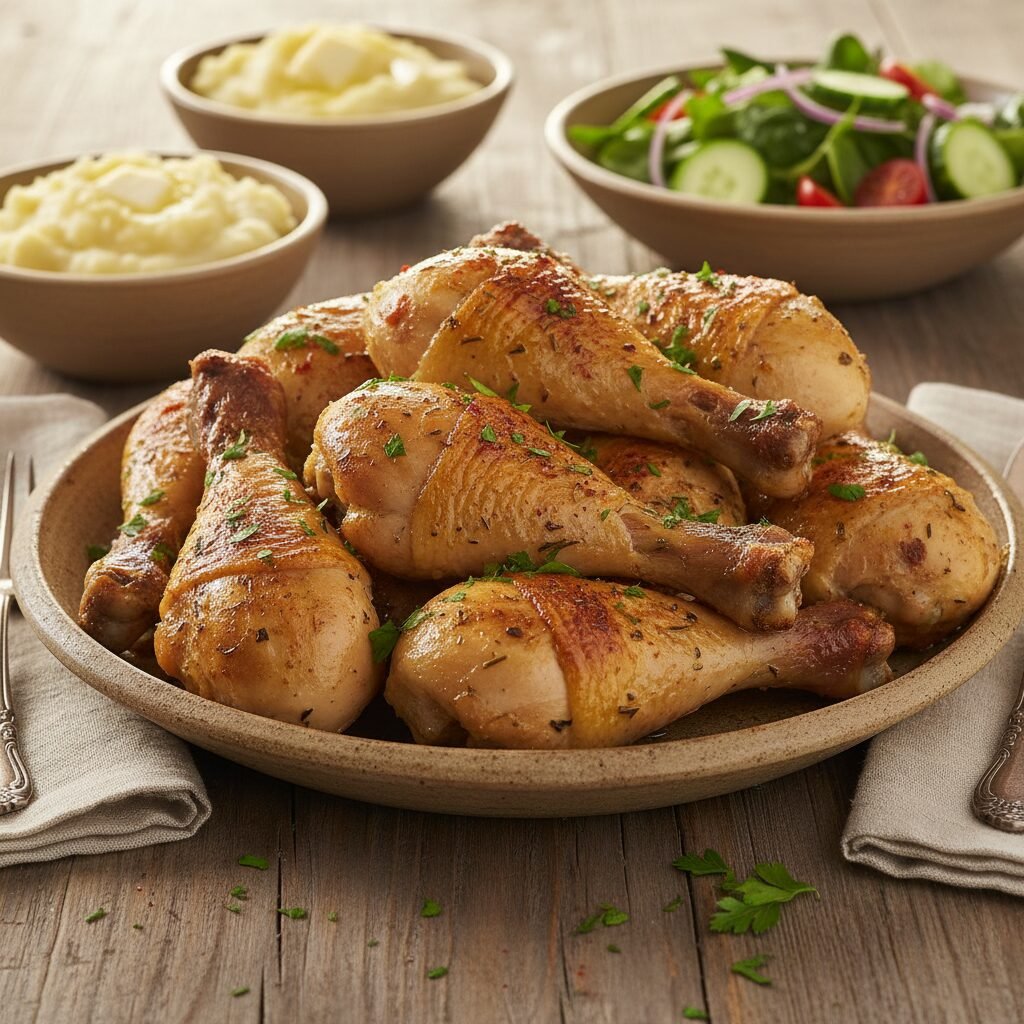
Baked Chicken Legs
Say goodbye to the 5 PM dinner panic with these foolproof baked chicken legs. With skin so crispy you’ll swear it was fried and meat that falls off the bone, this recipe is about to become your family’s most requested meal.
10 minutes
40 minutes
50 minutes
4-6 servings
Main Course
Baking
American
Gluten Free
Let’s be real for a second, mamas. The 5 PM dinner scramble is real. You’ve got homework on the table, laundry in the basket, and a hungry crew asking, ‘What’s for dinner?’ for the tenth time. Enter the humble chicken leg. It is the unsung hero of the poultry world, and today, we are giving it the royal treatment it deserves. I am talking about Baked Chicken Legs that are golden brown, shatteringly crispy on the outside, and incredibly juicy on the inside.
For years, I was intimidated by cooking bone-in chicken. I was terrified of undercooking it or, conversely, turning it into dry leather. But once I cracked the code on high-heat roasting and the importance of a good dry rub, everything changed. This isn’t just a recipe; it is a sanity-saver. It is budget-friendly (drumsticks are so affordable!), naturally fun to eat (food with a built-in handle? Yes, please!), and requires ingredients you likely already have in your pantry.
Whether you are feeding picky toddlers who refuse to eat anything green or a hungry partner who wants a hearty meal, these drumsticks deliver. Plus, the oven does all the heavy lifting, leaving you free to help with math homework or—let’s be honest—sneak a glass of wine.
History & Origins
Chicken drumsticks have been a staple of American comfort food for generations, often associated with summer picnics and Sunday suppers. While fried chicken has historically held the crown for ‘crispiest skin,’ the shift towards healthier home cooking in the late 20th century brought oven-baking to the forefront. Originally, baking chicken was seen as the ‘dry’ alternative to frying. However, as home cooks became more adventurous with convection settings and wire racks, we learned that we didn’t need a vat of oil to achieve that crave-worthy crunch.
This specific style of preparation—using a spice rub rather than a wet marinade—has roots in Southern barbecue traditions, where the meat is treated simply to let the natural flavors shine. It bridges the gap between the nostalgic fried chicken of our childhoods and the convenient, wholesome meals we strive to put on the table for our own kids today.
Why This Recipe Works
The magic of this recipe lies in the science of rendering fat and high-heat cooking. Chicken legs (drumsticks) are dark meat, which means they contain more connective tissue and fat than chicken breasts. This makes them incredibly forgiving; it is actually quite hard to overcook them to the point of dryness.
By baking at a relatively high temperature (400°F/200°C), we achieve two things simultaneously: we cook the meat through safely, and we render the fat under the skin. As that fat renders, it essentially ‘fries’ the skin from the inside out. Using a wire rack is the final secret weapon—it allows hot air to circulate under the chicken, ensuring the bottom doesn’t get soggy sitting in its own juices. The result? 360-degree crispiness without the deep fryer mess.
Why You’ll Love This Recipe
- ✓Budget-Friendly: Drumsticks are one of the most affordable cuts of meat.
- ✓Kid-Approved: Fun to eat and mild in flavor.
- ✓Gluten-Free & Keto: Perfect for various dietary needs.
- ✓Minimal Prep: Only 10 minutes of hands-on time.
- ✓Pantry Staples: Uses spices you already have.
- ✓Crispy Skin: No deep frying required!
Equipment You’ll Need
- ✓Large rimmed baking sheet
- ✓Wire cooling rack (oven safe) to fit inside the baking sheet
- ✓Paper towels
- ✓Small mixing bowl
- ✓Kitchen tongs
- ✓Meat thermometer
Ingredients
- ✓8-10 Chicken drumsticks (skin-on, bone-in)
- ✓2 tablespoons Olive oil (or avocado oil)
- ✓1 teaspoon Smoked paprika (for that BBQ vibe)
- ✓1 teaspoon Garlic powder
- ✓1 teaspoon Onion powder
- ✓1/2 teaspoon Dried oregano (or thyme)
- ✓1/2 teaspoon Salt (adjust to taste)
- ✓1/2 teaspoon Black pepper
- ✓1/4 teaspoon Cayenne pepper (optional, leave out for the kiddos)
- ✓Fresh parsley for garnish (optional)
Instructions
- Preheat and Prep: Preheat your oven to 400°F (200°C). Line a rimmed baking sheet with aluminum foil for easy cleanup (because who wants to scrub pans?), and place an oven-safe wire rack on top. Lightly spray the rack with non-stick spray.
- The Most Important Step – Dry the Chicken: Remove the chicken legs from their packaging and pat them thoroughly dry with paper towels. I mean really dry them. Moisture is the enemy of crispiness! If the skin is wet, it will steam instead of crisp.
- Mix the Rub: In a small bowl, combine the smoked paprika, garlic powder, onion powder, oregano, salt, pepper, and cayenne (if using). Whisk it together until well blended.
- Season: Drizzle the olive oil over the dried chicken legs. You can do this right on the prep board or in a large bowl. Rub the oil all over to coat. Then, sprinkle the spice mixture generously over the chicken, using your hands to massage the spices into the meat and under any loose skin.
- Arrange: Place the seasoned drumsticks on the wire rack. Make sure they are not touching each other; they need personal space for the air to circulate properly.
- Bake: Place the baking sheet in the oven and bake for 40-45 minutes. I like to flip them once halfway through (around the 20-minute mark) to ensure even color, but it is not strictly necessary if you are using a wire rack.
- Check for Doneness: The chicken is safe to eat at 165°F (74°C), but for drumsticks, I actually prefer them closer to 175°F or 180°F. This allows the connective tissue to break down further, making the meat fall-off-the-bone tender. Use your meat thermometer to check the thickest part without touching the bone.
- Rest and Serve: Remove from the oven and let them rest for 5 minutes. This lets the juices redistribute. Garnish with fresh parsley if you are feeling fancy, and serve hot!
Expert Cooking Tips
- ✓Don’t skip the drying: I cannot stress this enough! Wet skin = soggy chicken. Use those paper towels liberally.
- ✓Room temperature chicken: If you have time, let the chicken sit on the counter for 15 minutes before baking. Cold chicken hitting a hot oven can cook unevenly.
- ✓Use a wire rack: This lifts the chicken out of the dripping fat. If you bake them directly on the pan, the bottoms will be soft and greasy.
- ✓The darker the better: Dark meat is tough. Don’t be afraid if the internal temp goes over 165°F. Unlike breast meat, drumsticks get better the longer they cook (within reason!).
- ✓Broil for extra crunch: If the skin isn’t quite as crispy as you’d like after 40 minutes, switch the oven to ‘Broil’ for 2-3 minutes. Watch it like a hawk though—it can burn in seconds!
Substitutions and Variations
Spice Blends: Feel free to swap the homemade rub for your favorite store-bought blend. Taco seasoning, lemon pepper, or a Cajun blend work beautifully.
Oil: Melted butter or ghee can be used instead of olive oil for a richer flavor.
Cut of Meat: This exact method works perfectly for bone-in, skin-on chicken thighs as well. Just add about 5-10 minutes to the cooking time as thighs are usually larger.
Common Mistakes to Avoid
The biggest mistake is overcrowding the pan. If the drumsticks are touching, they create steam pockets, and you will lose that lovely crispiness. Another common error is washing the chicken. Please don’t do this! It spreads bacteria around your sink and adds unnecessary moisture to the skin. Finally, taking them out too early. Dark meat takes longer to become tender than white meat; if it’s chewy, it likely needed another 10 minutes.
Serving Suggestions
These drumsticks are incredibly versatile! For a classic comfort meal, serve them alongside creamy mashed potatoes and roasted green beans. If you want to keep it low-carb, a big Caesar salad or cauliflower rice pairs perfectly. My kids love dipping these in ranch dressing or BBQ sauce, so I always put little ramekins of sauce on the table. For a summer vibe, pair with coleslaw and corn on the cob.
Storage and Reheating Tips
Fridge: Store leftovers in an airtight container for up to 3-4 days. They are great for meal prep!
Freezer: You can freeze cooked drumsticks for up to 3 months. Thaw overnight in the fridge before reheating.
Reheating: Do NOT use the microwave if you want to keep the skin crispy. Reheat in the oven at 350°F for 10-15 minutes, or pop them in an air fryer for 3-4 minutes to bring that crunch back to life.
Nutrition Facts (Estimated)
| Serving Size | 2 Drumsticks |
| Calories | 380 |
| Fat | 22g |
| Saturated Fat | 6g |
| Unsaturated Fat | 10g |
| Trans Fat | 0g |
| Cholesterol | 160mg |
| Sodium | 450mg |
| Carbohydrates | 1g |
| Fiber | 0g |
| Sugar | 0g |
| Protein | 38g |
Frequently Asked Questions
Do I need to wash the chicken before cooking?
No! The USDA recommends against washing raw poultry as it can splash bacteria onto your sink and countertops. Plus, the extra water makes it harder to get the skin crispy.
Why are my drumsticks bloody near the bone?
This is actually common in young chickens and doesn’t necessarily mean it’s undercooked. The pigment from the bone marrow can leak out during cooking. Always trust your meat thermometer—if it says 165°F+ (74°C+), it is safe to eat!
Can I make this recipe in an Air Fryer?
Absolutely! Preheat your air fryer to 400°F. Cook the seasoned drumsticks for about 20-25 minutes, flipping halfway through. They come out incredibly crispy in the air fryer.
How do I know when they are done without a thermometer?
While a thermometer is best, you can check by piercing the thickest part of the meat with a knife. The juices should run clear, not pink, and the meat should start pulling away from the bone slightly.
Can I use frozen chicken legs?
It is best to thaw them completely first. Baking from frozen will result in uneven cooking and rubbery skin. Thaw them in the fridge overnight for the best results.
Should I cover the chicken with foil while baking?
No, leave them uncovered. Covering them traps the steam and will result in soft, soggy skin. We want that hot air to hit the skin directly.
Can I use this rub on chicken breasts?
Yes, the flavor is great on breasts! However, you will need to reduce the cooking time significantly (usually 20-25 minutes) to avoid drying out the white meat.
Is this recipe spicy?
With the 1/4 teaspoon of cayenne, it has a tiny kick but is generally mild. If you are sensitive to spice or cooking for toddlers, simply omit the cayenne pepper and it will be completely mild.
Conclusion
There you have it, friends! The easiest, crispest, most delicious baked chicken legs you will ever make. I hope this recipe buys you a little extra time in your evening and brings some smiles to your dinner table. It really is the little wins—like a dinner everyone eats without complaining—that make this mom-life sweet. If you try this recipe, please snap a picture and tag me on Instagram or leave a comment below; I love seeing your creations!