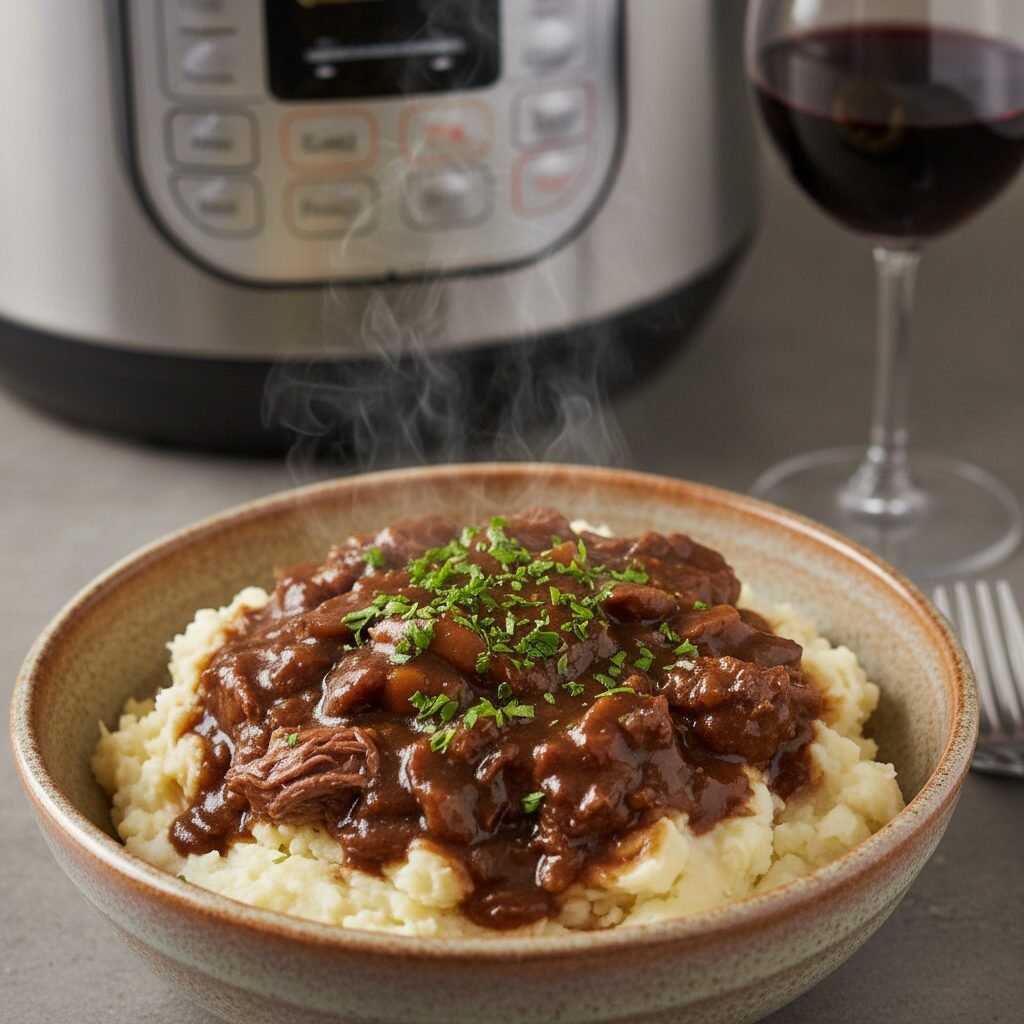
Instant Pot Beef Tips
If you are looking for the ultimate comfort food that tastes like it simmered all day but is ready in a flash, you have found it! These beef tips are so tender they practically fall apart, and that glossy gravy is liquid gold.
15 mins
30 mins
55 mins
4-6 Servings
Dinner
Pressure Cooker
American
Gluten Free
Hey there, busy mamas! Let’s be real for a second—some days, just getting dinner on the table feels like running a marathon. Between soccer practice, homework battles, and the never-ending laundry pile, we all need a few “back pocket” recipes that deliver massive flavor with minimal effort. Enter my absolute favorite weeknight savior: Instant Pot Beef Tips.
There is something so incredibly nostalgic about beef tips. It screams Sunday supper at Grandma’s house, doesn’t it? But who has 4 hours to watch a pot simmer on the stove on a Tuesday? Not me! That is the magic of the Instant Pot. We are taking a tough, budget-friendly cut of meat and transforming it into buttery, melt-in-your-mouth bites of heaven in a fraction of the time. The pressure cooker forces all that savory goodness right into the meat, breaking down the connective tissue until it is spoon-tender.
My husband literally cheers when he smells this cooking, and my picky eaters? They lick their plates clean—especially when I serve this over a mountain of creamy mashed potatoes to soak up that rich, dark gravy. It is hearty, it is wholesome, and it warms you from the inside out. Grab your pressure cooker, ladies, because this recipe is about to become a permanent fixture in your weekly meal rotation!
History & Origins
Beef tips have a humble yet delicious history, deeply rooted in American comfort food traditions, particularly in the South and Midwest. Historically, “beef tips” were often the scraps or trimmings left over from butchering larger, more expensive steaks like tenderloins or sirloins. Waste not, want not, right? Home cooks would take these smaller, tougher bits and braise them slowly in liquid—usually a mix of broth, onions, and whatever seasonings were on hand—until they were tender enough to eat.
In the mid-20th century, this dish became a diner staple and a common “blue-plate special,” often served over white bread (creating the famous “beef on a shingle” vibe) or egg noodles. It was the epitome of working-class gourmet: taking an inexpensive ingredient and using time and heat to make it taste like a million bucks.
With the advent of modern pressure cooking, specifically the explosion of the Instant Pot in the 2010s, this classic dish got a major revival. We no longer have to wait for a slow Sunday afternoon to enjoy braised beef. We can achieve that “simmered all day” texture and depth of flavor in under an hour, making this historical comfort food accessible for the modern, busy family.
Why This Recipe Works
So, why does this recipe work so well, specifically in the Instant Pot? It all comes down to the science of collagen and pressure. We typically use Chuck Roast for this recipe. Chuck comes from the shoulder of the cow, which is a well-exercised muscle. This means it is loaded with connective tissue (collagen). If you just pan-fry chuck roast quickly, it will be tough and chewy like shoe leather.
However, when you cook it under high pressure, the boiling point of water increases (up to about 250°F). This intense, moist heat environment rapidly breaks down that tough collagen and converts it into gelatin. This gelatin is the secret weapon! Not only does it make the meat incredibly tender and juicy, but it also seeps into the cooking liquid, giving the gravy a luxurious, silky mouthfeel that you just can’t get with broth alone.
Additionally, we start by searing the meat. This creates the Maillard reaction—the browning of the proteins and sugars on the surface of the beef. This step is non-negotiable! It builds a complex, savory flavor base that permeates the entire dish. By deglazing the pot with beef broth afterwards, we lift those browned bits (called fond) and incorporate that deep, roasted flavor into the gravy. It is a perfect culinary storm of texture and taste!
Why You’ll Love This Recipe
- ✓Ready in under an hour but tastes slow-cooked.
- ✓Uses budget-friendly chuck roast.
- ✓Rich, glossy gravy made right in the pot.
- ✓Freezer-friendly for meal prepping.
- ✓Kid-approved comfort food.
Equipment You’ll Need
- ✓6-quart Instant Pot or Pressure Cooker
- ✓Sharp Chef’s Knife
- ✓Cutting Board
- ✓Wooden Spoon (for deglazing)
- ✓Small Whisk
- ✓Measuring Cups and Spoons
Ingredients
- ✓2 lbs Chuck Roast, cut into 1.5-inch cubes (remove excess hard fat)
- ✓2 tbsp Olive Oil or Avocado Oil, divided
- ✓1 large Yellow Onion, diced
- ✓8 oz Cremini Mushrooms, sliced (optional, but recommended!)
- ✓3 cloves Garlic, minced
- ✓2 cups Beef Broth (low sodium is best)
- ✓1 tbsp Worcestershire Sauce
- ✓1 tbsp Soy Sauce (adds depth and color)
- ✓1 tsp Dried Thyme
- ✓1 tsp Onion Powder
- ✓1/2 tsp Salt (adjust to taste)
- ✓1/2 tsp Black Pepper
- ✓2 tbsp Cornstarch + 2 tbsp Cold Water (for the slurry)
- ✓Fresh Parsley for garnish
Instructions
- Prep the Meat: Pat your beef cubes dry with paper towels. This is crucial for a good sear! Season generously with the salt, pepper, and onion powder.
- Sear in Batches: Turn your Instant Pot to ‘Sauté’ mode (High). Add 1 tablespoon of oil. Once shimmering, add half of the beef. Sear for 2-3 minutes per side until a nice brown crust forms. Do not crowd the pan, or the meat will steam instead of sear! Remove the first batch, add the remaining oil, and sear the second batch. Set all meat aside on a plate.
- Sauté Aromatics: Add the diced onion and sliced mushrooms to the empty pot. Sauté for 3-4 minutes until the onions are soft and translucent. Add the minced garlic and thyme, cooking for just 30 seconds until fragrant.
- Deglaze the Pot: Pour in about 1/2 cup of the beef broth. Use your wooden spoon to aggressively scrape the bottom of the pot to release all those stuck-on brown bits. Note: This prevents the dreaded ‘Burn’ notice!
- Pressure Cook: Add the rest of the broth, Worcestershire sauce, soy sauce, and return the beef (and any juices on the plate) to the pot. Stir well to combine. Secure the lid, set the valve to ‘Sealing’. Select ‘Manual’ or ‘Pressure Cook’ on HIGH for 25 minutes.
- Natural Release: When the timer beeps, allow the pressure to release naturally for at least 10-15 minutes. This helps the meat fibers relax and stay tender. After 15 minutes, carefully switch the valve to ‘Venting’ to release any remaining steam.
- Thicken the Gravy: Remove the lid. Press ‘Cancel’ then ‘Sauté’. In a small bowl, whisk the cornstarch and cold water until smooth. Stir this slurry into the bubbling liquid in the pot. Let it boil for 2-3 minutes until the gravy thickens to your liking.
- Serve: Taste and adjust salt/pepper if needed. Serve hot over mashed potatoes, rice, or egg noodles, garnished with fresh parsley.
Expert Cooking Tips
- ✓Don’t skip the sear! It adds a depth of flavor that you just can’t get from boiling the meat. It’s worth the extra 10 minutes.
- ✓Cut evenly: Try to keep your beef cubes roughly the same size (about 1.5 inches) so they cook evenly.
- ✓Check the seal: Before starting, make sure your silicone ring is properly seated in the lid to ensure the pot comes to pressure.
- ✓Room temp meat: If you have time, let the beef sit on the counter for 20 minutes before cooking. Cold meat hits the hot pan and lowers the temp too fast.
- ✓Umami bomb: The soy sauce doesn’t make it taste Asian; it just enhances the beefiness. Don’t skip it!
Substitutions and Variations
If you don’t have Chuck Roast, you can use pre-cut “stew meat” from the grocery store, though it is sometimes a mix of cuts and can be slightly less tender—if using stew meat, add 5 minutes to the cook time. For a Gluten-Free version, ensure your Worcestershire sauce and Soy Sauce (use Tamari) are certified GF. If you aren’t a fan of mushrooms, simply leave them out; the gravy will still be delicious! You can also swap the beef broth for red wine for a deeper, more sophisticated flavor profile (use 1/2 cup wine and 1.5 cups broth).
Common Mistakes to Avoid
The biggest mistake people make is not deglazing the pot thoroughly. If those little brown bits from searing stay stuck to the bottom, the Instant Pot senses overheating and triggers the “Burn” error, shutting off the heat. Scrape that bottom well! Another common issue is Quick Releasing the pressure immediately. Doing this causes the moisture inside the meat to boil instantly and evaporate, leaving you with dry, tough meat. Let it rest (Natural Release) to keep those juices locked inside.
Serving Suggestions
This dish is all about the gravy, so you need a vessel to catch it! My go-to is creamy garlic mashed potatoes. However, buttery wide egg noodles are a close second and very traditional. For a lighter option, cauliflower mash works wonders. Pair it with a side of steamed green beans, roasted carrots, or a crisp garden salad with vinaigrette to cut through the richness of the beef.
Storage and Reheating Tips
This recipe stores beautifully, making it perfect for meal prep! Refrigerator: Store leftovers in an airtight container for up to 4 days. The gravy will thicken significantly in the fridge; just add a splash of water or broth when reheating. Freezer: Let the beef and gravy cool completely, then transfer to a freezer-safe bag or container. Freeze for up to 3 months. Thaw overnight in the fridge before reheating on the stove or in the microwave.
Nutrition Facts (Estimated)
| Serving Size | 1 cup |
| Calories | 380 |
| Fat | 22g |
| Saturated Fat | 9g |
| Unsaturated Fat | 11g |
| Trans Fat | 0g |
| Cholesterol | 105mg |
| Sodium | 850mg |
| Carbohydrates | 8g |
| Fiber | 1g |
| Sugar | 2g |
| Protein | 35g |
Frequently Asked Questions
Can I use frozen meat?
Yes, you can! However, you won’t be able to sear it, which means you lose some flavor. Skip the searing step, dump everything in, and increase the cooking time to 35-40 minutes on High Pressure. It will still be tasty, but fresh is best for texture.
Why is my meat tough?
If your beef tips are tough, they likely weren’t cooked long enough or you released the pressure too quickly. Chuck roast needs time to break down. If you open the pot and it’s tough, put the lid back on and cook for another 5-10 minutes.
Can I make this in a Slow Cooker?
Absolutely! Sear the meat and sauté veggies in a skillet first, then transfer everything to your crockpot. Cook on Low for 7-8 hours or High for 3-4 hours. Add the cornstarch slurry in the last 30 minutes.
What if I get the Burn Notice?
Don’t panic! Release the pressure, open the lid, and check the bottom of the pot. Stir everything well and scrape up any bits. You might need to add a little more thin liquid (water or broth). Seal it back up and restart.
Can I add potatoes and carrots to the pot?
You can, but they turn to mush if cooked for the full 25 minutes with the beef. I recommend cooking the beef first, removing it, and then pressure cooking the veggies in the gravy for 3-4 minutes, or just boiling them separately.
Is this recipe spicy?
Not at all! It is savory and rich. The black pepper adds a tiny bit of warmth, but it is very kid-friendly. Feel free to reduce the pepper if your little ones are sensitive.
How do I make the gravy thicker?
If the gravy is too thin after adding the slurry, just let it boil on ‘Sauté’ mode for a few more minutes to reduce. You can also make a second batch of cornstarch slurry and add it in small increments.
Can I use cornstarch alternatives?
Yes, Arrowroot powder or Tapioca flour work as 1:1 substitutes for cornstarch if you are avoiding corn or grains.
Conclusion
There you have it, friends! The coziest, heartiest, most delicious Instant Pot Beef Tips recipe that is sure to win over your family. It is amazing how a simple kitchen appliance can turn basic ingredients into something that tastes like a restaurant-quality meal. I hope this recipe brings a little warmth and ease to your dinner table this week.
If you try this out, please snap a picture and tag me on Pinterest or Instagram! I love seeing your creations. And don’t forget to pin this recipe for later—trust me, you are going to want to make this again and again. Happy cooking, mamas!