Steak Seasoning
If you are looking for that secret ingredient to take your grilling game from ‘just okay’ to ‘absolutely mouthwatering,’ you have found it! This DIY steak rub is savory, perfectly balanced, and costs pennies to make compared to those fancy store-bought blends.
5 minutes
0 minutes
5 minutes
1/2 cup
Seasoning
Mixing
American
Gluten Free
Hey there, friends! Let’s talk about steak night. Is there anything better than the smell of a juicy ribeye or a tender filet mignon sizzling on the grill on a warm summer evening? In our house, steak night is a celebration. It is that special treat we give ourselves after a long week of soccer practices, homework battles, and endless laundry piles. But for the longest time, I felt like my home-cooked steaks were missing that oomph that you get at a high-end steakhouse.
I used to buy those expensive little jars of ‘gourmet’ rubs from the grocery store. You know the ones—they cost like $8 for a tiny amount, and half the time, they are mostly just salt! I finally decided enough was enough. I went into my pantry, pulled out my spice collection, and started experimenting. After a few trial runs (and a very happy husband acting as the taste tester), I cracked the code.
This homemade steak seasoning is truly a game-changer. It has that perfect balance of salty, savory, and just a hint of smoky heat that creates the most incredible crust on the meat. Plus, I know exactly what is in it—no anti-caking agents or weird preservatives. Just pure, delicious flavor. Whether you are grilling for a crowd or making a romantic dinner for two, this seasoning is going to make you look like a total pro!
History & Origins
While seasoning meat is as old as cooking itself, the concept of a specific ‘steak seasoning’ blend has some interesting roots. Historically, salt was the primary preservative and flavor enhancer. But as trade routes opened up, spices like black pepper (often called ‘black gold’) became the standard companion to salt. The classic ‘Dalmatian Rub’—just salt and pepper—is the grandfather of all steak seasonings.
However, the robust blends we know and love today, similar to the famous Montreal Steak Spice, trace their origins to Jewish delis in Eastern Europe and later, North America. These delis used pickling spices (like coriander, garlic, and mustard seed) to cure brisket for smoked meat. Eventually, someone had the brilliant idea to take those dry curing spices and rub them directly onto steaks before broiling. The result was a flavorful, textured crust that locked in juices. My recipe pays homage to these savory traditions but simplifies it for the modern home cook’s pantry.
Why This Recipe Works
You might be wondering, why bother mixing a blend when I can just use salt and pepper? The magic lies in the synergy of ingredients and the texture. First, the base of Kosher salt does more than just flavor; it draws out moisture from the surface of the steak, which then dissolves the salt and gets reabsorbed, seasoning the meat deep down (a process called dry brining).
Secondly, the addition of garlic and onion powder provides a savory ‘umami’ punch that mimics the richness of aged beef. The smoked paprika isn’t just for flavor; the natural sugars in the pepper caramelize under heat, helping to form that beautiful, dark brown crust (the Maillard reaction) that we all crave. Finally, using coarse black pepper instead of fine dust ensures that the spices don’t burn instantly on the grill, providing a pleasant crunch and a burst of heat in every bite.
Why You’ll Love This Recipe
- ✓Ready in under 5 minutes
- ✓Uses common pantry staples
- ✓No MSG or artificial preservatives
- ✓Customizable heat and salt levels
- ✓Makes a perfect DIY gift in a cute jar
- ✓Gluten-free, Keto, and Paleo friendly
Equipment You’ll Need
- ✓Small mixing bowl
- ✓Whisk or fork
- ✓Measuring spoons
- ✓Airtight spice jar or mason jar
- ✓Funnel (optional but helpful)
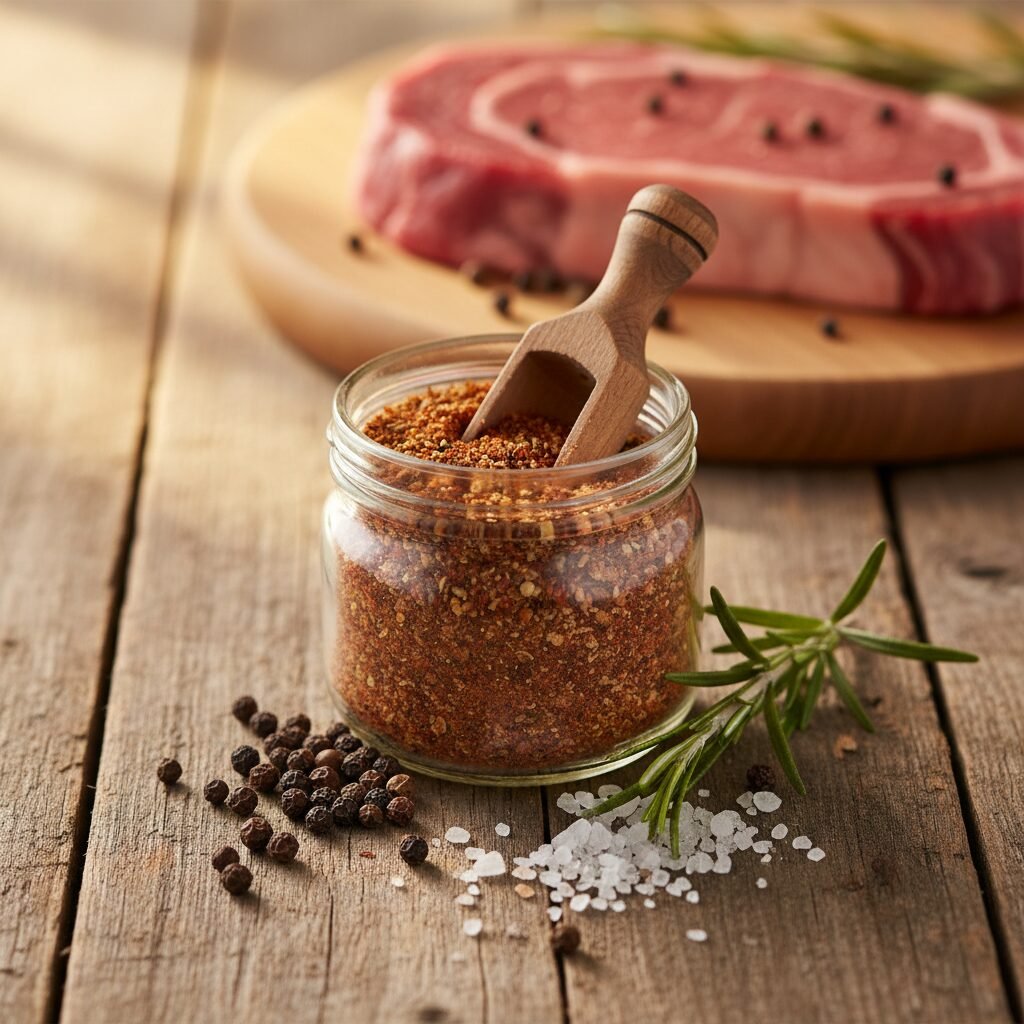
Ingredients
- ✓3 tablespoons Kosher salt (Note: If using table salt, reduce by half!)
- ✓3 tablespoons coarsely ground black pepper (freshly cracked is best)
- ✓2 tablespoons garlic powder
- ✓1 tablespoon onion powder
- ✓1 tablespoon smoked paprika (regular paprika works, but smoked is better)
- ✓1 teaspoon dried thyme
- ✓1 teaspoon dried rosemary (crush it slightly between your fingers)
- ✓1/2 teaspoon red pepper flakes (optional, for a little kick)
Instructions
- Gather your ingredients. Pull all your spices out onto the counter. There is nothing worse than starting to mix and realizing you are out of garlic powder! Make sure your jar is clean and completely dry.
- Measure and mix. In a small mixing bowl, combine the Kosher salt, black pepper, garlic powder, onion powder, smoked paprika, dried thyme, rosemary, and red pepper flakes.
- Whisk it well. Use a small whisk or a fork to stir the spices together. You want to make sure the garlic and onion powders are evenly distributed among the salt and pepper so you get a perfect balance of flavor in every pinch.
- Transfer to storage. carefully pour the seasoning blend into an airtight spice jar or a small mason jar. I like to use a small funnel for this part to avoid making a mess on the counter.
- Label and date. Put a cute label on the jar with the name and the date you made it. It’s ready to use immediately!
Expert Cooking Tips
- ✓Pat the meat dry. Before applying the seasoning, always pat your steaks dry with a paper towel. This helps the seasoning stick and ensures a better sear.
- ✓Don’t be shy! You want to coat the steak generously. A good rule of thumb is to use about 1 tablespoon of seasoning per pound of meat.
- ✓The ‘Dry Brine’ method. For the best results, season your steaks 45 minutes to an hour before cooking and let them sit at room temperature. The salt will work its magic and tenderize the meat.
- ✓Oil first. I like to rub a tiny bit of olive oil or avocado oil on the steak before sprinkling the seasoning. It acts as a binder.
- ✓Crush the herbs. When adding the dried rosemary and thyme, crush them in the palm of your hand before adding to the bowl to release their aromatic oils.
Substitutions and Variations
This recipe is super forgiving! If you don’t have smoked paprika, you can use sweet paprika, though you’ll miss a bit of that smoky depth. If you are watching your sodium intake, feel free to reduce the Kosher salt to 1 or 2 tablespoons, or use a salt substitute. For the herbs, dried oregano or dried parsley can be swapped in for thyme or rosemary if that’s what you have on hand. If you like things spicy, add a pinch of cayenne pepper!
Common Mistakes to Avoid
The biggest mistake people make is using table salt instead of Kosher salt without adjusting the measurements. Table salt is much finer and saltier by volume; if you swap it 1:1, your steak will be inedible! Another mistake is burning the spices. If you are searing at extremely high temperatures (like over 600°F), the garlic powder can scorch. If you like a super high-heat sear, try applying the rub after the initial sear or cooking at a slightly more moderate high heat.
Serving Suggestions
While this is called ‘Steak Seasoning,’ do not let the name limit you! This blend is incredibly versatile. It is absolutely delicious on roasted potatoes or sprinkled over grilled vegetables like asparagus and zucchini. My kids actually love it on burgers and even mixed into meatloaf. I’ve also used it to season pork chops and roasted chicken thighs. It’s basically an all-purpose savory magic dust.
Storage and Reheating Tips
Store your homemade seasoning in an airtight container, like a glass spice jar or a small mason jar. Keep it in a cool, dark place (like your pantry or a spice drawer), away from direct sunlight and heat. Humidity is the enemy here, as it can make the onion and garlic powders clump up. If stored correctly, it will stay fresh and potent for up to 6 months. If it starts to clump, just give the jar a good shake before using.
Nutrition Facts (Estimated)
| Serving Size | 1 teaspoon |
| Calories | 5 |
| Fat | 0g |
| Saturated Fat | 0g |
| Unsaturated Fat | 0g |
| Trans Fat | 0g |
| Cholesterol | 0mg |
| Sodium | 580mg |
| Carbohydrates | 1g |
| Fiber | 0g |
| Sugar | 0g |
| Protein | 0g |
Frequently Asked Questions
Can I use fresh herbs instead of dried?
I don’t recommend it if you plan to store the seasoning. Fresh herbs contain moisture which will cause the salt to clump and the mixture to spoil. Stick to dried herbs for a shelf-stable blend.
Why do you specify Kosher salt?
Kosher salt has a larger grain size which makes it easier to pinch and sprinkle evenly. It also adheres better to the meat and dissolves at a perfect rate for dry brining.
Is this seasoning spicy?
It has a very mild kick from the black pepper and optional red pepper flakes, but it is not ‘hot.’ It is family-friendly! If you want zero heat, omit the red pepper flakes.
How much seasoning should I use per steak?
Generally, aim for about 1 tablespoon of seasoning per pound of steak. You want a visible layer of spices coating the surface.
Can I use this on chicken?
Absolutely! It is delicious on grilled chicken breast, roasted chicken thighs, and even on turkey burgers.
Does this recipe contain sugar?
No, this is a sugar-free savory blend. However, if you like a sweeter bark on your steak, you can add 1 tablespoon of brown sugar to the mix.
How long does it last?
If kept in an airtight container in a cool, dry place, it is best used within 6 months for maximum flavor potency.
Can I double or triple this recipe?
Yes! This recipe scales up perfectly. Make a big batch and give small jars as gifts to friends and family.
Conclusion
I hope you give this homemade steak seasoning a try for your next BBQ or family dinner night! It really is one of those small changes that makes a massive difference in the final flavor of your meal. Once you taste the difference between this fresh, custom blend and the stale stuff sitting on the grocery store shelf, you will never go back. If you make it, snap a picture and tag me—I love seeing your culinary creations! Happy grilling, mamas!