Zucchini Fritters Recipe
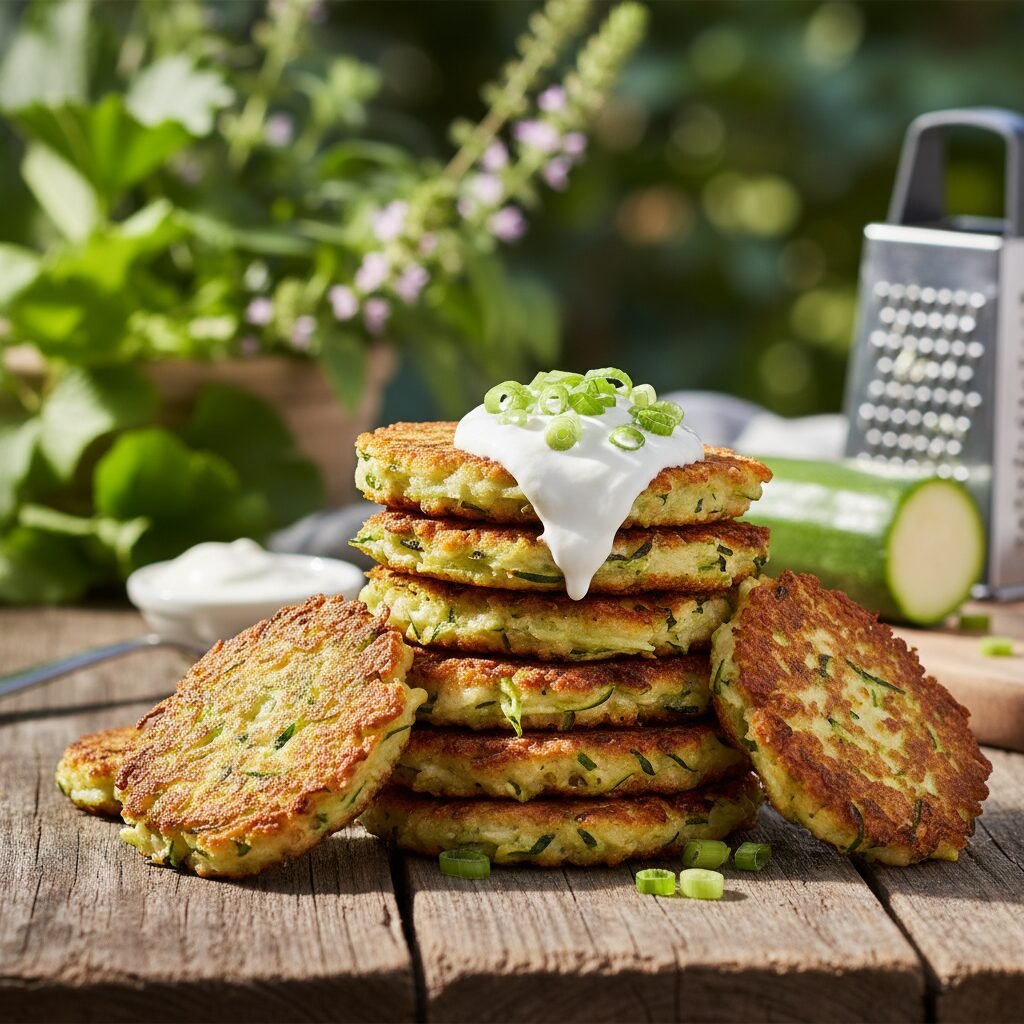
If your garden is overflowing with summer squash, this is the rescue recipe you’ve been waiting for! These golden, crispy zucchini fritters are cheesy, tender on the inside, and crunch-tastic on the outside—a total win for picky eaters and busy moms alike.
15 minutes
15 minutes
30 minutes
12 fritters
Appetizer / Side Dish
Pan Fry
American / Mediterranean Inspired
Vegetarian
Hey there, lovely mamas and foodies! If you are anything like me, by the time mid-July rolls around, you are practically swimming in zucchini. It starts innocently enough with a few cute green squash, and suddenly, your kitchen counter looks like a farmer’s market explosion. But don’t panic! Today, I am sharing my absolute favorite way to use up that green goodness: Crispy Cheesy Zucchini Fritters.
Let’s be real for a second—getting kids (and let’s be honest, sometimes husbands) to eat their greens can be a battle. But these fritters? They are a total game-changer. They taste more like a savory, cheesy pancake or a hashbrown than a vegetable. My little ones call them ‘green monster cakes’ and devour them with a side of ranch or sour cream. They are crispy on the edges, soft and cheesy in the middle, and packed with so much flavor that you forget you are eating a low-calorie veggie.
I have spent years perfecting this recipe because, let’s face it, we have all had a bad fritter experience. You know the ones—soggy, limp, and falling apart in the pan. Not today! I am going to teach you the golden rule of zucchini prep that ensures a perfect crunch every single time. Whether you serve these as a quick appetizer, a light vegetarian dinner, or a savory breakfast topped with a poached egg, this recipe is about to become a staple in your weekly rotation. So, grab your box grater, and let’s get cooking!
History & Origins
While we might think of these as a modern way to hide veggies from toddlers, vegetable fritters actually have a rich and delicious history that spans the globe. The concept of dipping vegetables in batter or mixing them with binders and frying them is centuries old. In Greece, they are known as Kolokithokeftedes (try saying that three times fast!), which are often packed with feta cheese and fresh mint. In Turkey, a similar dish called Mücver is a beloved staple, typically served with a garlicky yogurt dip.
Historically, fritters were a brilliant way for home cooks to stretch ingredients and use up seasonal produce before it spoiled. By adding a little flour and egg to the abundance of summer squash, families could create a filling, substantial meal out of humble ingredients. Today, we are keeping that tradition alive, bridging the gap between those classic Mediterranean flavors and our modern need for quick, wholesome, family-friendly meals.
Why This Recipe Works
The science behind the perfect fritter comes down to one major enemy: water. Zucchini is made up of about 95% water. If you just grate it and throw it in a batter, that water releases during cooking, steaming the fritter from the inside out and resulting in a mushy mess. This recipe works because we use the power of osmosis to combat this.
By salting the grated zucchini and letting it sit, we draw out the excess moisture before it ever hits the pan. The salt breaks down the cell walls, releasing the liquid so we can squeeze it out (and I mean really squeeze it!). This ensures that when the batter hits the hot oil, it sears and crisps up immediately rather than steaming. Additionally, the combination of baking powder and egg creates a light lift, making them fluffy rather than dense, while the Parmesan cheese acts as both a flavor bomb and a secondary binder that creates those irresistible crispy lace edges.
Why You’ll Love This Recipe
- ✓Ready in under 30 minutes
- ✓Kid-friendly and toddler-approved
- ✓Uses up excess garden zucchini
- ✓Vegetarian and easily adaptable
- ✓Freezer-friendly for meal prep
- ✓Crispy texture without deep frying
Equipment You’ll Need
- ✓Box grater or food processor
- ✓Large mixing bowl
- ✓Clean kitchen towel or cheesecloth
- ✓Large non-stick skillet or cast iron pan
- ✓Spatula
- ✓Measuring cups and spoons
Ingredients
- ✓1.5 lbs zucchini (about 3-4 medium zucchini)
- ✓1 teaspoon kosher salt (for drawing out moisture)
- ✓2 scallions (green onions), finely sliced
- ✓1 large clove garlic, minced
- ✓1/2 cup all-purpose flour
- ✓1/2 cup grated Parmesan cheese
- ✓1 large egg, lightly beaten
- ✓1/2 teaspoon baking powder
- ✓1/4 teaspoon freshly ground black pepper
- ✓Olive oil or vegetable oil, for frying
- ✓Sour cream or Greek yogurt, for serving
Instructions
- Step 1: Grate the Zucchini. Wash your zucchini and trim the ends. Using the large holes of a box grater, grate the zucchini into a large bowl. You do not need to peel them—the skin adds great color and nutrients!
- Step 2: The Salt Soak. Sprinkle the 1 teaspoon of salt over the grated zucchini and toss to combine. Let this sit for at least 10 minutes. This is the magic step where the salt draws out the water.
- Step 3: Squeeze, Squeeze, Squeeze! Transfer the zucchini to a clean kitchen towel or cheesecloth. Gather the corners and twist tightly over the sink. Squeeze out as much liquid as humanly possible. You should be left with a fairly dry ball of zucchini pulp. Discard the liquid.
- Step 4: Make the Batter. Place the squeezed zucchini back into a dry mixing bowl. Add the sliced scallions, minced garlic, flour, Parmesan cheese, beaten egg, baking powder, and black pepper. Stir with a fork until everything is well combined and no pockets of dry flour remain.
- Step 5: Heat the Pan. In a large skillet (cast iron is great for crispiness), heat about 2 tablespoons of olive oil over medium-high heat. The oil should be shimmering but not smoking.
- Step 6: Fry the Fritters. Drop heaping tablespoons of the batter into the pan. Use the back of your spoon or spatula to flatten them slightly into rounds. Do not overcrowd the pan; cook in batches if necessary.
- Step 7: Flip and Crisp. Cook for 3 to 4 minutes on the first side until the bottom is deep golden brown and crispy. Flip carefully and cook for another 2 to 3 minutes on the second side. If they are browning too fast, lower the heat to medium.
- Step 8: Drain and Serve. Transfer the cooked fritters to a plate lined with paper towels to absorb excess oil. Serve immediately while hot and crispy, topped with sour cream or yogurt.
Expert Cooking Tips
- ✓The Squeeze is Key: I cannot stress this enough—if you skip squeezing the water out, your fritters will be soggy. It is the most important step!
- ✓Check Your Oil Temp: If the oil is not hot enough, the fritters will absorb it and become greasy. If it is too hot, the outside will burn before the inside cooks. Aim for a medium-high sizzle.
- ✓Don’t Overcrowd: Leave space between the fritters in the pan. This allows the steam to escape and ensures the edges get crispy instead of steaming against each other.
- ✓Taste Test: Fry one small test fritter first. Taste it to see if it needs more salt, pepper, or cheese before cooking the whole batch.
Substitutions and Variations
One of the best things about this recipe is how adaptable it is! If you are gluten-free, simply swap the all-purpose flour for a 1:1 gluten-free baking blend or almond flour (though almond flour will make them slightly more delicate). For a low-carb or Keto version, use almond flour and add an extra tablespoon of cheese to help bind it.
Not a fan of Parmesan? You can easily swap it for crumbled Feta cheese for a Greek twist, or shredded Cheddar for a kid-favorite version. If you are out of scallions, finely diced yellow onion or fresh chives work beautifully. You can also add fresh herbs like dill, parsley, or basil to change up the flavor profile depending on what is growing in your garden!
Common Mistakes to Avoid
The biggest mistake people make is not squeezing out enough liquid. If your batter looks watery in the bowl, squeeze it again! Another common issue is flipping too soon. Be patient—let that crust form. If you try to flip before the bottom is set, the fritter will fall apart. Lastly, avoid using a food processor to grate the zucchini if possible; sometimes it turns the veggie into a mushy pulp rather than nice shreds, which affects the texture.
Serving Suggestions
These fritters are incredibly versatile! Serve them as an appetizer with a dollop of sour cream or a zesty garlic aioli. For a light lunch, pair them with a fresh Greek salad or some sliced tomatoes. My personal favorite mom-hack? Serve them for breakfast topped with a poached or fried egg and a dash of hot sauce. It’s like a hashbrown, but healthier! They also make a fantastic side dish for grilled chicken or salmon.
Storage and Reheating Tips
To Store: Leftover fritters can be stored in an airtight container in the refrigerator for up to 3-4 days. Place a paper towel between layers to absorb moisture.
To Reheat: Do NOT microwave them, or they will turn into rubbery mush. Reheat them in a toaster oven, air fryer (350°F for 3-4 minutes), or a dry skillet to bring back that crunch.
To Freeze: Arrange cooked and cooled fritters on a baking sheet and freeze until solid. Then transfer them to a freezer bag for up to 2 months. Reheat directly from frozen in the oven or air fryer.
Nutrition Facts (Estimated)
| Serving Size | 2 fritters |
| Calories | 180 |
| Fat | 10g |
| Saturated Fat | 3g |
| Unsaturated Fat | 6g |
| Trans Fat | 0g |
| Cholesterol | 45mg |
| Sodium | 450mg |
| Carbohydrates | 14g |
| Fiber | 2g |
| Sugar | 2g |
| Protein | 8g |
Frequently Asked Questions
Why are my zucchini fritters soggy inside?
This is almost always due to excess moisture. Make sure you salt the zucchini and squeeze it very thoroughly with a towel. Also, ensure your pan is hot enough so the batter sears immediately.
Can I bake these instead of frying?
Yes, you can! Bake at 400°F (200°C) for about 20-25 minutes, flipping halfway through. However, keep in mind they won’t be quite as crispy as the pan-fried version.
Can I make the batter ahead of time?
I don’t recommend it. Even after squeezing, zucchini continues to release moisture. If the batter sits too long, it will become watery. It’s best to cook them right after mixing.
My fritters are falling apart when I flip them. Why?
You might be flipping too early or your batter might be too wet. Let the bottom crust fully form and turn golden brown before attempting to flip. If the batter is too loose, add another tablespoon of flour.
How do I make these gluten-free?
Simply substitute the all-purpose flour with your favorite gluten-free all-purpose flour blend, chickpea flour, or almond flour.
Can I use yellow squash instead of zucchini?
Absolutely! Yellow summer squash has a very similar texture and water content. You can even use a mix of both for a colorful dish.
Is this recipe good for meal prep?
Yes! They freeze beautifully. Make a double batch, freeze them, and pop them in the toaster oven for a quick lunch or snack.
What is the best dipping sauce for these?
Classic sour cream is great, but a Greek yogurt dip with lemon juice, dill, and garlic is my absolute favorite pairing.
Conclusion
I hope you and your family love these Crispy Cheesy Zucchini Fritters as much as we do! It is truly such a satisfying way to eat your veggies and enjoy the flavors of the season. If you give this recipe a try, please leave a comment below and let me know how it turned out—I love hearing from you! And don’t forget to pin this recipe to your ‘Summer Dinner Ideas’ board on Pinterest so you can find it easily next time the garden explodes with zucchini. Happy cooking, mamas!