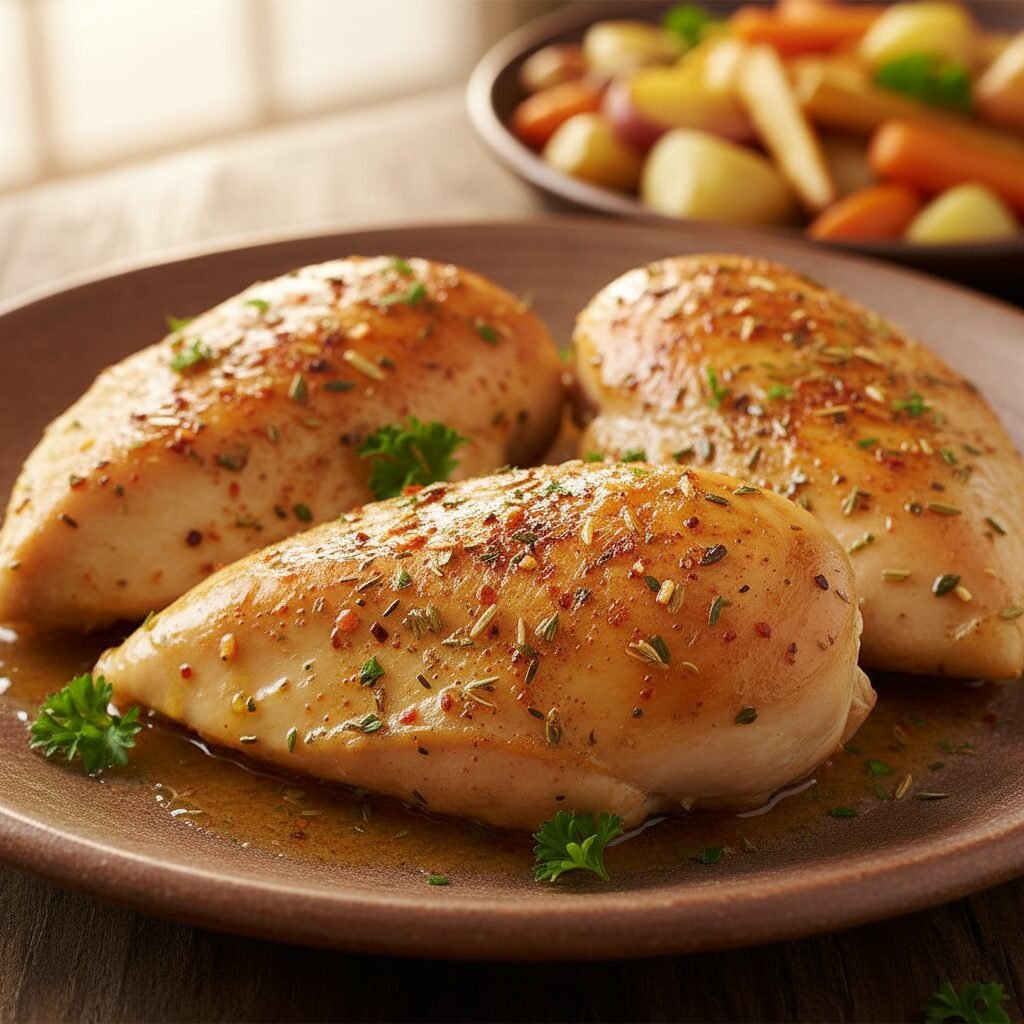
Baked Chicken Breasts
If you have ever suffered through chewing on a piece of chicken that tasted like a dry shoe, this recipe is your redemption song, mama! I am sharing my absolute secret weapon for getting perfectly juicy, melt-in-your-mouth chicken breasts using a simple oven method that works like magic.
10 minutes
20 minutes
30 minutes
4 servings
Dinner
Baking
American
Gluten Free
Let’s be real for a second, friends. Is there anything more disappointing than pulling a tray of chicken out of the oven, smelling that delicious aroma, cutting into it, and realizing… it’s dry? We have all been there. It is the 5:00 PM panic, the kids are asking what’s for dinner, and you are staring at a package of boneless, skinless chicken breasts wondering how to transform them into something edible that won’t require a gallon of ketchup to swallow.
For years, I avoided cooking chicken breasts because I just couldn’t get them right. I stuck to thighs because they are more forgiving, but my husband really prefers the lean protein of a breast. So, I went on a mission. A culinary quest, if you will, to find the perfect method. I tried low and slow, I tried searing first, I tried covering it in foil. But honestly? Who has time for complicated steps on a Tuesday night? Not this mama!
This recipe is the result of all that trial and error. It is simple, fast, and relies on a specific seasoning blend and a high-heat technique that locks in moisture. This isn’t just a recipe; it is a meal prep savior. Whether you are tossing it into a Caesar salad, shredding it for tacos, or serving it alongside some roasted broccoli, this baked chicken is about to become the MVP of your kitchen rotation.
History & Origins
Believe it or not, the obsession with boneless, skinless chicken breasts is a relatively modern phenomenon. If we look back at our grandmothers’ cookbooks, they were mostly roasting whole birds or braising bone-in pieces. It wasn’t until the health-conscious waves of the late 1970s and 80s—the era of low-fat everything—that the chicken breast took center stage in American kitchens. Everyone wanted the high protein without the fat.
The problem? Without the bone to insulate the meat and the skin to baste it, home cooks struggled. We stripped the chicken of its natural protection and then wondered why it dried out in the oven! For decades, “baked chicken” became synonymous with “diet food” that was bland and tough. But culinary techniques have evolved, and we have learned that we don’t need to sacrifice flavor for health. By borrowing techniques from professional kitchens—like brining (even quickly) and understanding oven thermodynamics—we have reclaimed the chicken breast as a delicious staple, not just a healthy obligation.
Why This Recipe Works
So, why does this specific method work when others fail? It comes down to two main scientific principles: mechanical tenderizing and high-heat cooking.
First, chicken breasts are naturally uneven—thick at one end and tapered at the other. If you bake them as-is, the thin end turns to leather before the thick end is safe to eat. By pounding the chicken to an even thickness, we ensure that every square inch cooks at the exact same rate. It creates a uniform surface area that retains moisture evenly.
Second, we bake at a high temperature (425°F). Many old recipes call for 350°F, which slowly dries out the meat while it cooks. High heat acts similarly to a sear in a pan; it cooks the exterior quickly, creating a delicious seasoned crust, and pushes the heat to the center fast enough that the proteins don’t have time to squeeze out all their moisture. Finally, the rest period is non-negotiable. It allows the muscle fibers, which contract during cooking, to relax and reabsorb the juices.
Why You’ll Love This Recipe
- ✓Ready in under 30 minutes
- ✓Zero marinating time required
- ✓Perfect for Sunday meal prep
- ✓High protein and low carb
- ✓Uses pantry staple spices
- ✓Kid-friendly and versatile
Equipment You’ll Need
- ✓Large baking dish or sheet pan
- ✓Parchment paper
- ✓Meat mallet or heavy rolling pin
- ✓Instant-read meat thermometer
- ✓Small mixing bowl
Ingredients
- ✓4 large boneless, skinless chicken breasts
- ✓2 tablespoons olive oil (or avocado oil)
- ✓1 tablespoon brown sugar (packed)
- ✓1 teaspoon paprika (smoked or sweet)
- ✓1 teaspoon dried oregano (or Italian seasoning)
- ✓1 teaspoon garlic powder
- ✓1 teaspoon onion powder
- ✓1/2 teaspoon kosher salt
- ✓1/2 teaspoon black pepper
- ✓Fresh parsley for garnish (optional)
Instructions
- Preheat and Prep: Preheat your oven to 425°F (220°C). This high heat is crucial! Line a large baking sheet or baking dish with parchment paper for easy cleanup.
- Pound the Chicken: Place the chicken breasts on a cutting board and cover with a sheet of plastic wrap. Using a meat mallet or a rolling pin, pound the thickest parts of the chicken until the breasts are an even thickness, about 3/4-inch thick. Do not skip this step!
- Make the Rub: In a small bowl, mix together the brown sugar, paprika, oregano, garlic powder, onion powder, salt, and pepper.
- Season: Place the chicken breasts in the baking dish. Drizzle the olive oil over both sides of the chicken, rubbing it in to coat. Sprinkle the seasoning mixture generously over both sides, pressing it into the meat with your hands.
- Bake: Bake in the preheated oven for 18-22 minutes. The exact time depends on the size of your breasts. Start checking at 18 minutes.
- Check Temp: Use an instant-read thermometer to check the internal temperature. You want to pull them out when they hit 160°F-162°F. The temperature will continue to rise to the safe 165°F while resting.
- Rest: Remove from the oven and loosely tent the pan with foil. Let the chicken rest for at least 5-10 minutes before slicing. This locks in the juices.
- Serve: Garnish with fresh chopped parsley if desired and serve warm.
Expert Cooking Tips
- ✓Invest in a Thermometer: It is the only way to guarantee you don’t overcook the meat. Guessing leads to dry chicken!
- ✓Don’t Skip the Pounding: Even thickness means even cooking. If you don’t have a mallet, use the bottom of a heavy saucepan.
- ✓The Resting Period: If you cut into the chicken immediately, all the juices will run out onto the cutting board instead of staying in the meat.
- ✓Room Temperature Start: If you have time, let the chicken sit on the counter for 15 minutes before baking to take the chill off. This helps it cook more evenly.
Substitutions and Variations
This recipe is incredibly versatile! If you are watching your sugar intake, you can swap the brown sugar for a monk fruit sweetener or omit it entirely—though it helps with caramelization. No olive oil? Melted butter or avocado oil works beautifully. For the spices, feel free to use a pre-made taco seasoning for a Mexican flair, or swap the oregano for dried rosemary and thyme for a more traditional roast chicken flavor.
Common Mistakes to Avoid
The biggest mistake people make is overcooking. Chicken breast goes from juicy to dry in a matter of two minutes. Trust your thermometer, not the clock. Another mistake is slicing too soon. I know it smells amazing, but give it that 5-minute rest! Lastly, avoid overcrowding the pan. If the chicken breasts are touching, they will steam instead of roast, and you will miss out on that lovely seasoned crust.
Serving Suggestions
This chicken goes with literally everything! For a classic comfort meal, serve it alongside creamy mashed potatoes and green beans. For a lighter lunch, slice it up cold and toss it into a Caesar salad or a grain bowl with quinoa and roasted veggies. It is also fantastic shredded and mixed with BBQ sauce for quick sandwiches.
Storage and Reheating Tips
Store leftovers in an airtight container in the refrigerator for up to 3-4 days. This is excellent for meal prep! To freeze, let the cooked chicken cool completely, then wrap individual breasts in plastic wrap and place them in a freezer-safe bag. They will keep for up to 3 months. Thaw overnight in the fridge before reheating gently.
Nutrition Facts (Estimated)
| Serving Size | 1 Chicken Breast (approx 6oz) |
| Calories | 280 kcal |
| Fat | 9g |
| Saturated Fat | 1.5g |
| Unsaturated Fat | 6g |
| Trans Fat | 0g |
| Cholesterol | 125mg |
| Sodium | 450mg |
| Carbohydrates | 2g |
| Fiber | 1g |
| Sugar | 1g |
| Protein | 46g |
Frequently Asked Questions
Do I really need to bake at 425°F?
Yes! Lower temperatures like 350°F take longer to cook the center, which gives the outer layers more time to dry out. The high heat seals the deal quickly.
How do I know when the chicken is done without a thermometer?
While a thermometer is best, you can pierce the thickest part with a knife. If the juices run clear (not pink), it is usually done. The meat should be opaque all the way through.
Can I use frozen chicken breasts?
You should thaw them completely first. Baking from frozen results in uneven cooking—the outside will be tough before the inside is safe to eat.
Why is my chicken rubbery?
Rubbery chicken is almost always a sign of overcooking. It can also happen with ‘woody breast’ syndrome, which is an issue with the quality of the meat itself, but usually, it is just cooked too long.
Do I need to cover the chicken with foil while baking?
No, bake it uncovered. This allows the hot air to roast the spices and create a nice texture. Only cover it with foil after it comes out of the oven to rest.
Can I use this rub on chicken thighs?
Absolutely! Chicken thighs are naturally juicier and may take a few minutes longer to cook, but the seasoning blend is delicious on any cut.
How do I reheat chicken without drying it out?
The best way is to reheat it gently in a skillet with a splash of water or chicken broth, covered with a lid. This steams moisture back into the meat.
Is brining necessary?
For this recipe, no. The pounding and high heat work well enough. However, if you have extra time, a 15-minute soak in lukewarm saltwater can add even more insurance against dryness.
Conclusion
There you have it, friends! The secret to the juiciest, most flavorful baked chicken breasts is finally yours. No more dry, sad dinners. Just pure, protein-packed deliciousness that your whole family will love. I hope this recipe makes your weeknights a little smoother and your dinner table a little happier. If you try this, please snap a photo and tag me—I love seeing your creations! Happy cooking!