Best Grilled Burger Recipe
Say goodbye to dry, flavorless hockey pucks forever! These burgers are melt-in-your-mouth juicy, seasoned to perfection, and so easy to make that they have become our absolute go-to for every single backyard cookout.
15 minutes
10 minutes
25 minutes
4 servings
Dinner
Grilling
American
Omnivore
Hey friends! Welcome back to my kitchen. If there is one thing that screams “summer” to me more than anything else, it is the smell of a charcoal grill firing up in the backyard while the kids run through the sprinklers. There is just something so nostalgic and comforting about a classic burger night. But let’s be honest for a second—how many times have you bitten into a homemade burger only to find it dry, crumbly, or just plain bland? I have been there, and it is heartbreaking!
For years, I struggled to replicate that restaurant-quality burger at home. I tried adding eggs, breadcrumbs, and every spice in the cabinet, but nothing quite hit the mark. It wasn’t until I simplified my approach and focused on the technique rather than a laundry list of fillers that I finally cracked the code. This recipe is the holy grail of grilling in our house. It is all about choosing the right meat, handling it with care (treat it like a newborn, mamas!), and nailing the cooking time.
Whether you are hosting a huge Fourth of July bash or just trying to get a quick dinner on the table on a Tuesday, these burgers are going to be your new best friend. They are juicy, savory, and hold up perfectly to all your favorite toppings. So, grab your apron and let’s get grilling!
History & Origins
Believe it or not, the beloved burger has a bit of a contested history! While ground beef dishes have been around for centuries (shoutout to the Hamburg steak from Germany), the concept of slapping that patty between two buns is distinctly American. Legend has it that the modern hamburger was born out of necessity at county fairs in the late 19th and early 20th centuries. Vendors needed a way for customers to eat their beef steaks while walking around, and thus, the bun was introduced!
Over the decades, the burger has evolved from a simple working-class meal to a gourmet icon. We have seen everything from fast-food revolutions to high-end steakhouses putting truffles on patties. But at its core, the burger remains the ultimate symbol of American comfort food and backyard gatherings. It brings people together, and that is why we love it so much.
Why This Recipe Works
So, why is this specific recipe the “best”? It comes down to science and simplicity. First, we strictly use 80/20 ground chuck. That 20% fat content is non-negotiable because fat equals flavor and moisture. If you go leaner, you risk a dry burger. As the fat renders during grilling, it bastes the meat from the inside out.
Secondly, we skip the binders. No eggs, no breadcrumbs. When you add fillers, you are making meatloaf, not a burger. By keeping the mixture loose and only gently shaping it, we preserve the texture of the beef. If you overwork the meat, the proteins cross-link tightly, resulting in a tough, rubbery texture. Finally, the thumbprint trick prevents the burger from puffing up into a ball, ensuring an even, flat surface for all those delicious toppings.
Why You’ll Love This Recipe
- ✓Uses 80/20 chuck for maximum juiciness
- ✓No fillers—just pure beefy flavor
- ✓Ready in under 30 minutes
- ✓Freezer-friendly for meal prep
- ✓Kid-approved and totally customizable
- ✓The thumbprint trick ensures flat, even cooking
Equipment You’ll Need
- ✓Outdoor Grill (Gas or Charcoal)
- ✓Large Mixing Bowl
- ✓Meat Thermometer
- ✓Metal Spatula
- ✓Parchment Paper
Ingredients
- ✓1.5 lbs Ground Beef Chuck (80/20 fat ratio is essential)
- ✓1 tbsp Worcestershire Sauce
- ✓1 tsp Garlic Powder
- ✓1 tsp Onion Powder
- ✓1/2 tsp Smoked Paprika (optional for smokiness)
- ✓1 tsp Kosher Salt
- ✓1/2 tsp Freshly Cracked Black Pepper
- ✓4 Brioche Buns
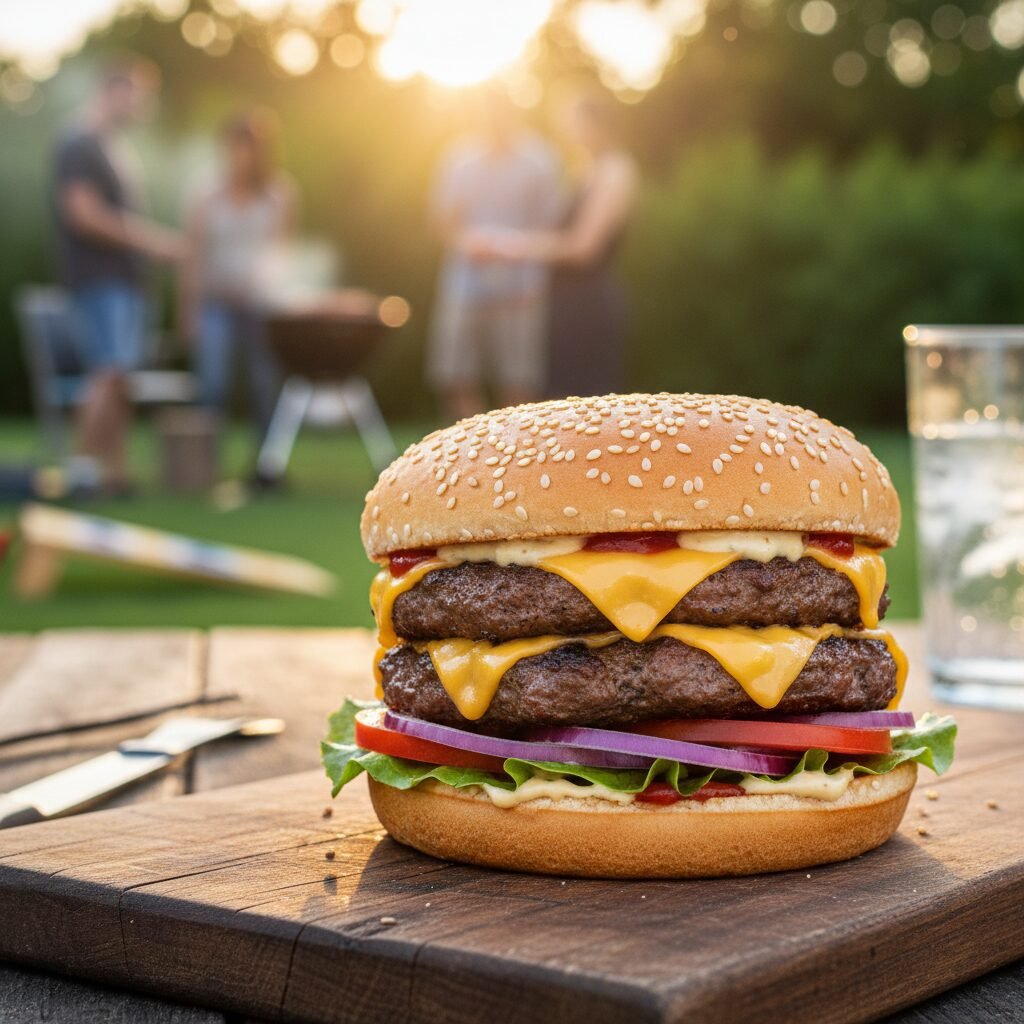
- ✓4 Slices Cheddar or American Cheese
- ✓Toppings: Lettuce, Tomato, Onion, Pickles, Ketchup, Mustard
Instructions
- Prepare the Meat: Take your ground beef out of the fridge about 15-20 minutes before cooking. In a large bowl, gently break up the meat.
- Season: Drizzle the Worcestershire sauce over the beef. In a small bowl, mix the garlic powder, onion powder, paprika, salt, and pepper. Sprinkle this evenly over the meat.
- Mix Gently: Using your hands, very gently mix the seasoning into the meat. Do not knead it like dough! Stop as soon as the spices are incorporated.
- Form Patties: Divide the meat into 4 equal portions. Gently shape them into round patties, making them slightly wider than your buns (they will shrink).
- The Thumbprint Trick: Press your thumb into the center of each patty to create a divot. This prevents the burger from bulging in the center while cooking.
- Preheat Grill: Heat your grill to medium-high heat (about 400°F to 450°F). Clean the grates and oil them lightly.
- Grill: Place the patties on the grill, indentation side up. Close the lid and cook for 4-5 minutes. Do not touch them!
- Flip: Flip the burgers. They should have nice grill marks and release easily. Cook for another 3-4 minutes on the other side.
- Add Cheese: In the last minute of cooking, place a slice of cheese on each patty and close the lid to melt.
- Rest and Serve: Remove burgers from the grill and let them rest on a plate for 5 minutes to redistribute juices. Meanwhile, toast your buns on the grill. Assemble and enjoy!
Expert Cooking Tips
- ✓Keep it Cold: If it is a super hot day, keep your shaped patties in the fridge until the very second they hit the grill to keep the fat solid.
- ✓Don’t Press: Never, and I mean never, press down on the burger with your spatula while it cooks. You are just squeezing out all the delicious juices!
- ✓Toast the Buns: A toasted bun adds texture and prevents the bread from getting soggy from the burger juices and condiments.
- ✓Check Temp: For safety, the USDA recommends 160°F, but for a juicy medium-well burger, look for around 150°F-155°F before resting.
Substitutions and Variations
If you aren’t a fan of red meat, you can swap the ground beef for ground turkey or chicken. Just be aware that poultry is much leaner, so you might want to add a tablespoon of olive oil or even some grated onion to the mix to keep it moist. For my gluten-free mamas, just swap the brioche buns for your favorite GF brand or try a lettuce wrap for a ‘protein style’ burger!
Common Mistakes to Avoid
The biggest mistake I see is over-handling the meat. When you squish and squeeze the ground beef too much, the proteins bind up tight, making the burger tough. Another common error is seasoning too early. Salt draws out moisture, so try to form your patties and season them right before you cook, or mix it in gently just before shaping.
Serving Suggestions
These burgers deserve some stellar sides! I love serving them with my Creamy Dill Potato Salad or a fresh Watermelon Feta Salad for a lighter contrast. Of course, you can’t go wrong with classic corn on the cob or some crispy oven-baked fries. Set up a ‘build your own burger’ bar so everyone can customize their own masterpiece!
Storage and Reheating Tips
If you have leftovers (which is rare in my house!), store the cooked patties in an airtight container in the fridge for up to 3 days. To reheat, I recommend using the oven or a skillet with a splash of water to steam them back to life—microwaving can make them rubbery. You can also freeze raw formed patties! Stack them with parchment paper in between and freeze for up to 3 months. Thaw in the fridge overnight before grilling.
Nutrition Facts (Estimated)
| Serving Size | 1 Burger (Patty only) |
| Calories | 280 kcal |
| Fat | 20g |
| Saturated Fat | 8g |
| Unsaturated Fat | 10g |
| Trans Fat | 1g |
| Cholesterol | 80mg |
| Sodium | 350mg |
| Carbohydrates | 0g |
| Fiber | 0g |
| Sugar | 0g |
| Protein | 22g |
Frequently Asked Questions
Why do my burgers shrink so much?
Burgers shrink because the fat renders out and the proteins contract. To minimize this, use 80/20 beef and make sure to do the ‘thumbprint trick’ by pressing a dimple in the center of the raw patty.
Can I cook these on the stove?
Absolutely! A cast-iron skillet is perfect for indoor burgers. Heat it to medium-high and cook for about 4-5 minutes per side. You’ll get a great crust.
When should I salt the burgers?
Ideally, salt the meat right before you form the patties and put them on the grill. Salting too far in advance can break down the meat structure and make it sausage-like.
How do I know when they are done?
The most accurate way is using an instant-read meat thermometer. 130-135°F for medium-rare, 140-145°F for medium, and 160°F for well-done.
What is the best cheese for burgers?
American cheese melts the best for that classic look, but Sharp Cheddar, Swiss, Pepper Jack, or even Blue Cheese crumbles are fantastic options.
Why do my burgers fall apart?
This usually happens if the fat content is too low (lean meat doesn’t bind as well) or if you flip them too early. Let a crust form before flipping.
Can I add egg or breadcrumbs?
Technically yes, but then you are making meatloaf patties. For a classic, juicy steakhouse-style burger, stick to just the meat and seasonings.
Should I close the grill lid?
Yes! Closing the lid creates an oven effect, cooking the inside of the burger while the direct heat sears the outside. It also prevents flare-ups.
Conclusion
There you have it, mamas! The absolute best grilled burger recipe that is sure to make you the hero of the neighborhood block party. It really is the simple things in life—like a perfectly cooked burger shared with family—that bring the most joy. I hope you give this recipe a try this weekend. If you do, please snap a picture and tag me on Instagram or leave a comment below; I love seeing your creations! Happy grilling!