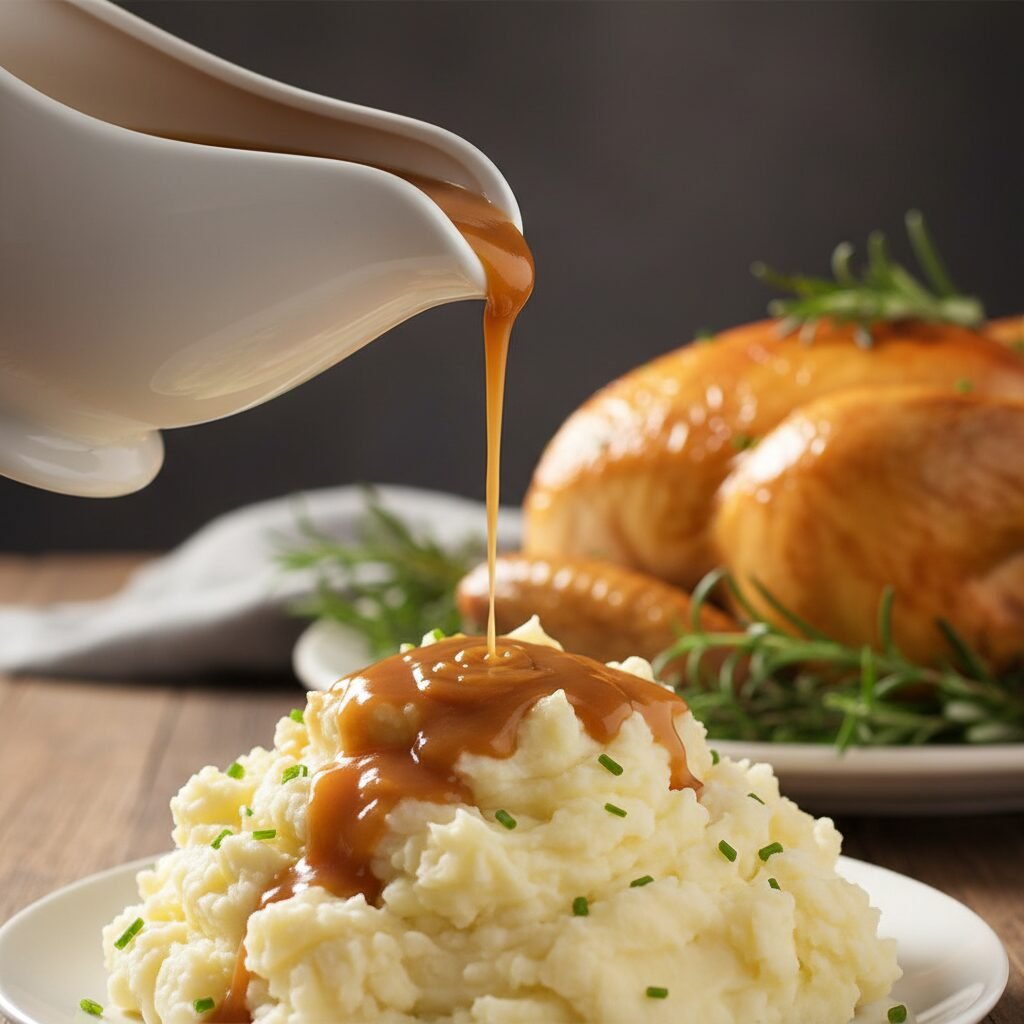
Chicken Gravy Recipe
Say goodbye to those salty, powdery packets forever, mamas! This foolproof chicken gravy comes together in just 10 minutes and tastes like a warm hug from Grandma. It is rich, savory, and silky smooth—the absolute best way to elevate your weeknight dinner.
5 minutes
10 minutes
15 minutes
2 cups (8 servings)
Sauce
Stovetop
American
Vegetarian
If there is one thing that can instantly turn a chaotic Tuesday night dinner into a soul-warming feast, it is a boatload of homemade gravy. We are talking about that rich, golden, savory liquid gold that cascades over fluffy mashed potatoes and makes everything on the plate taste infinitely better. As a busy mom, I used to rely on those little tear-open packets or jars from the grocery store aisle because I was terrified of making gravy from scratch. I thought it was complicated, prone to lumps, or required a degree in culinary arts. Boy, was I wrong!
Let me tell you, making your own chicken gravy is one of the most empowering kitchen skills you can learn. Not only is it incredibly budget-friendly, but the taste difference is night and day. Store-bought versions often taste like salt and preservatives, but this recipe? It tastes like love. It tastes like slow Sundays at home, even if you whipped it up in 10 minutes flat while helping with homework. Whether you have just roasted a whole bird and have glorious pan drippings, or you are staring at a bare pantry with just butter and broth, this recipe has you covered. It is the ultimate forgiveness factor for slightly dry chicken breast, and honestly, my kids would probably eat an old shoe if I covered it in this sauce.
In this post, I am going to walk you through every single step to ensure you get a glossy, lump-free result every single time. We will chat about the magic of the roux, how to season it to perfection, and why this will become your new go-to family staple. Grab your whisk, ladies, because we are about to make some magic happen right on the stovetop!
History & Origins
Gravy has a long and delicious history that is deeply rooted in the need to waste nothing in the kitchen. Historically, the concept of thickening meat juices dates back to medieval times, but the creamy, roux-based gravy we know and love today owes a lot to French culinary traditions. It is essentially a derivative of a Velouté sauce, which is one of the five French ‘Mother Sauces’ codified by chef Auguste Escoffier in the early 20th century. A Velouté is made by thickening a light stock (like chicken or fish) with a blonde roux.
However, the American version of chicken gravy has taken on a life of its own, becoming a cornerstone of Southern cooking and comfort food culture. In early American kitchens, ‘pan gravy’ was a way to stretch the fat and flavor from a roasted bird to feed a large family. By adding flour and milk or water to the drippings, cooks could create a substantial sauce that added calories and flavor to simple sides like biscuits or potatoes. Over generations, it has evolved from a necessity to a beloved tradition, gracing Thanksgiving tables and Sunday suppers alike. It represents the heart of home cooking: taking simple, humble ingredients and transforming them into something spectacular.
Why This Recipe Works
The science behind this gravy is actually quite simple, and understanding it guarantees success. The base of this recipe is a roux—a mixture of fat (butter or drippings) and flour cooked together. When you cook the flour in the fat, you are coating the starch granules in oil. This is crucial because it prevents the flour from clumping together when you add the liquid. If you threw raw flour directly into hot broth, the outside of the flour blob would gelatinize instantly, creating a waterproof barrier that traps raw flour inside—hello, lumps!
By cooking the roux first, we also toast the flour, removing that raw, pasty flavor and adding a nutty depth. When the liquid (chicken stock) is slowly whisked in, the starch granules swell and burst, releasing amylose and amylopectin molecules that trap water and thicken the sauce. The addition of onion and garlic powder enhances the savory notes (umami) without the texture of chopped veggies, keeping the gravy silky smooth. The optional splash of heavy cream or milk at the end adds a touch of fat that emulsifies with the sauce, giving it that glossy, restaurant-quality sheen that makes your mouth water just looking at it.
Why You’ll Love This Recipe
- ✓Ready in under 15 minutes
- ✓Can be made with or without pan drippings
- ✓Uses simple pantry staples
- ✓Freezer-friendly for meal prep
- ✓Kid-approved flavor
- ✓Easily customizable for dietary needs
Equipment You’ll Need
- ✓Medium Saucepan or Skillet
- ✓Wire Whisk (essential for no lumps!)
- ✓Measuring Cups and Spoons
- ✓Liquid Measuring Cup
- ✓Wooden Spoon
Ingredients
- ✓4 tablespoons unsalted butter (or reserved chicken fat/drippings)
- ✓4 tablespoons all-purpose flour
- ✓2 cups chicken broth or stock (low sodium preferred)
- ✓1/2 teaspoon onion powder
- ✓1/2 teaspoon garlic powder
- ✓1/4 teaspoon poultry seasoning (optional for that holiday taste)
- ✓Salt and freshly cracked black pepper to taste
- ✓2 tablespoons heavy cream (optional for extra richness)
- ✓1 teaspoon fresh chopped parsley (for garnish)
Instructions
- Prep the Liquid: If you are using pan drippings from a roast chicken, pour them into a liquid measuring cup. Let the fat separate from the juices. You will need 4 tablespoons of fat (top layer). If you don’t have enough, supplement with butter. If using store-bought broth, have it ready near the stove.
- Make the Roux: In a medium saucepan over medium heat, melt the butter (or drippings fat). Once bubbly, sprinkle in the flour. Whisk continuously for about 1-2 minutes. You want the mixture to bubble and turn a pale golden color. This cooks out the raw flour taste—do not skip this step!
- Add Liquid Slowly: This is the crucial moment! While whisking the roux vigorously with one hand, slowly pour in about 1/2 cup of the chicken broth with the other. The mixture will sputter and thicken rapidly into a paste. Keep whisking!
- Thin it Out: Continue adding the remaining broth in slow, steady streams, whisking constantly to ensure the paste dissolves into the liquid smoothly. By the time all the broth is added, it should look like a thin soup.
- Simmer to Thicken: Bring the mixture to a gentle simmer. Reduce heat to medium-low and let it cook for 3-5 minutes. Stir occasionally. As the gravy heats up, the starches will expand and the gravy will thicken to that perfect spoon-coating consistency.
- Season: Stir in the onion powder, garlic powder, and poultry seasoning (if using). Taste the gravy. Add salt and plenty of black pepper. Remember, if you used salted butter or regular broth, you might not need much extra salt.
- Finish and Serve: If you want a creamy, velvety finish, stir in the optional heavy cream now. Remove from heat. Pour into a gravy boat and garnish with fresh parsley. Serve immediately over mashed potatoes, chicken, or biscuits!
Expert Cooking Tips
- ✓Warm Broth Works Best: If you have time, microwave your broth for a minute before adding it to the roux. Warm liquid incorporates into the hot fat/flour mixture more smoothly than cold liquid.
- ✓Whisk is Key: Do not try to make this with just a spoon. A wire whisk is your best friend for breaking up flour pockets.
- ✓Too Thick?: If your gravy gets too thick (like pudding), just whisk in an extra splash of broth or water until it reaches your desired consistency.
- ✓Too Thin?: Let it simmer longer! Evaporation will thicken it. If it is still stubborn, you can make a tiny slurry of cornstarch and water and whisk that in.
- ✓Taste as You Go: Different stocks have different salt levels. Always taste before serving so you don’t end up with a salt lick!
Substitutions and Variations
Pantry Swaps
- Gluten-Free: Simply swap the all-purpose flour for a high-quality 1:1 Gluten-Free All-Purpose Baking Flour. Cornstarch can also work, but the texture is more gelatinous; mix 2 tbsp cornstarch with cold water and add to boiling broth instead of making a roux.
- Dairy-Free: Use vegan butter or oil (like olive oil or bacon grease) instead of butter. Skip the optional heavy cream at the end.
- Broth Alternatives: If you don’t have chicken broth, vegetable broth works perfectly fine. In a pinch, you can use water mixed with bouillon cubes or ‘Better Than Bouillon’ paste (highly recommended for flavor!).
- Herbs: Fresh sage, thyme, or rosemary are beautiful additions. Add whole sprigs while simmering and remove them before serving for a subtle infusion.
Common Mistakes to Avoid
Oops! Let’s Fix That
Lumpy Gravy: This happens if you add the liquid too fast or don’t whisk enough. Don’t panic! Pour the gravy through a fine-mesh sieve into your serving boat. No one will ever know.
Tastes Like Flour: This means the roux wasn’t cooked long enough before adding the liquid. Next time, let the butter and flour bubble for at least 2 minutes until it smells nutty.
Greasy Gravy: If the sauce separates or looks oily, the ratio of fat to flour was off (too much fat). Whisk in a tiny bit more stock vigorously, or try blending it with an immersion blender to re-emulsify.
Serving Suggestions
This gravy is the ultimate multitasker. While it is obviously the soulmate to Creamy Garlic Mashed Potatoes, do not stop there! It is fantastic poured over open-faced hot turkey sandwiches, drizzled onto roasted vegetables (especially broccoli and carrots), or used as a dipping sauce for homemade chicken tenders. For a Southern twist, serve it over fresh, flaky buttermilk biscuits for breakfast!
Storage and Reheating Tips
Fridge: Store leftover gravy in an airtight container in the refrigerator for up to 3-4 days. It will solidify into a gelatin-like blob when cold—this is normal!
Reheating: Scoop the gravy into a saucepan and heat over low. You will likely need to add a splash of water or broth and whisk vigorously to bring it back to a smooth consistency.
Freezer: Yes, you can freeze gravy! Place it in a freezer-safe bag or container for up to 3 months. Thaw overnight in the fridge before reheating. Note: If you added cream, the texture might change slightly upon thawing, but a good whisk usually fixes it.
Nutrition Facts (Estimated)
| Serving Size | 1/4 cup |
| Calories | 65 kcal |
| Fat | 5g |
| Saturated Fat | 3g |
| Unsaturated Fat | 1.5g |
| Trans Fat | 0g |
| Cholesterol | 12mg |
| Sodium | 280mg |
| Carbohydrates | 4g |
| Fiber | 0.1g |
| Sugar | 0.5g |
| Protein | 1g |
Frequently Asked Questions
Can I make this ahead of time?
Absolutely! You can make it 1-2 days in advance. Just store it in the fridge and reheat it on the stove with a splash of extra broth to loosen it up before serving.
How do I get a darker brown gravy?
The color comes from the stock and how long you cook the roux. For a darker gravy, cook the flour and butter longer until it turns a deep amber color (be careful not to burn it!). You can also add a few drops of Worcestershire sauce or Kitchen Bouquet browning sauce.
Can I use turkey drippings instead?
Yes! This recipe is universal. Turkey, beef, or pork drippings all work with the same ratio: 1 tablespoon of fat to 1 tablespoon of flour per cup of liquid.
What if I don’t have a whisk?
While a whisk is best, you can use a fork in a pinch. Just be very diligent and stir quickly. Alternatively, use an immersion blender at the end to smooth out any imperfections.
Why is my gravy separating?
Separation usually happens if the heat is too high or there is too much fat. Try whisking in a teaspoon of hot water vigorously. If that fails, an immersion blender is a great fix.
Is bouillon better than boxed broth?
I personally love bouillon pastes (like Better Than Bouillon) because they have a more concentrated flavor than standard boxed broth, which can sometimes taste watery. If using bouillon, watch your salt addition carefully.
Can I add mushrooms?
Oh, please do! Sauté sliced mushrooms in the butter before adding the flour. It adds an incredible earthiness and texture.
How much gravy does this make?
This recipe yields about 2 cups. I usually calculate about 1/4 to 1/3 cup per person, so this serves 6-8 people comfortably.
Conclusion
There you have it, friends! The mystery of the perfect chicken gravy has been solved. No more relying on those salty packets or stressing out at the last minute while the turkey cools. With just a little butter, flour, and love, you can create a sauce that truly brings the family together. It is these simple, homemade touches that our kids remember most about family dinners. So go ahead, pour it on thick, and watch everyone lick their plates clean. Happy cooking!