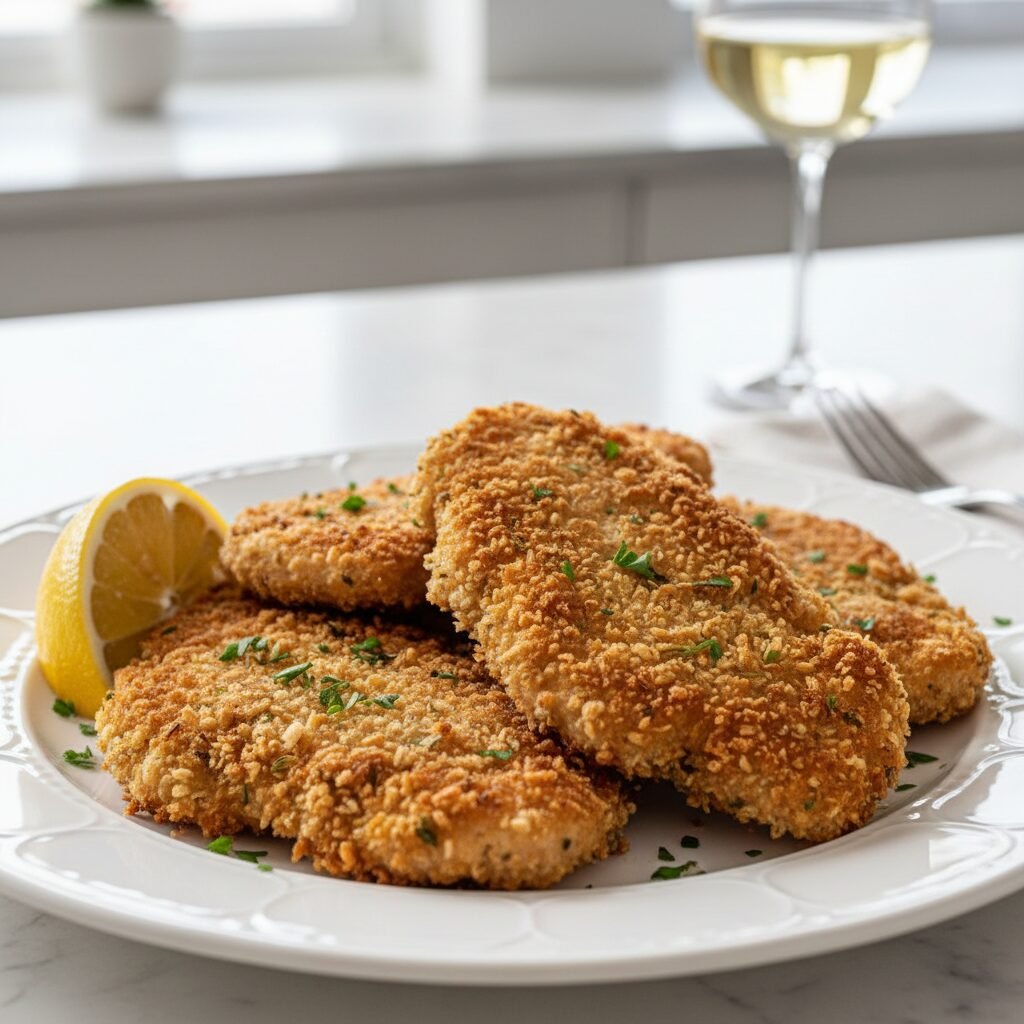
Crispy Air Fryer Chicken Cutlets
If you are looking for that perfect ‘crunch’ without the deep-fryer mess, you have found your new holy grail recipe. These cutlets are juicy on the inside, shatteringly crisp on the outside, and ridiculously easy to whip up on a busy Tuesday.
15 minutes
12 minutes
27 minutes
4 Servings
Dinner
Air Fryer
American / Italian
Low Fat
Hey friends! Let’s have a real talk about the 5:00 PM dinner panic. You know the one—where everyone is hungry, you’re exhausted, and the thought of standing over a popping, sizzling skillet of hot oil makes you want to order pizza instead. We have all been there! But I am about to change your weeknight dinner game forever with these Crispy Air Fryer Chicken Cutlets.
I used to avoid making breaded chicken during the week because, frankly, the cleanup was a nightmare. Oil splatters everywhere, the lingering smell of fry grease in the house for days… no thank you. But when I finally tried adapting my grandmother’s classic breaded chicken recipe for the air fryer, my mind was officially blown. I am not exaggerating when I say these are better than the pan-fried version. The hot circulating air creates a crust that is so golden and crunchy, you won’t believe it wasn’t deep-fried.
Plus, this is one of those unicorn recipes that the entire family agrees on. My picky eaters dip them in ketchup, my husband puts them on a sandwich with melted provolone, and I love slicing one up over a big arugula salad with lemon vinaigrette. It is versatile, healthy, and fast. So, grab your air fryer basket and let’s get cooking!
History & Origins
The concept of the breaded cutlet is a culinary traveler that has found a home in almost every culture. Whether you call it Schnitzel (Austria/Germany), Cotoletta (Italy), Milanesa (South America), or Katsu (Japan), the technique is universally loved: pound meat thin, coat it in crumbs, and fry it until golden. It is comfort food in its purest form.
Historically, this method was a way to make tougher or smaller cuts of meat more palatable and substantial. By pounding the meat, you tenderize the fibers, and the breading adds volume and texture. Traditionally, this required a significant amount of lard, butter, or oil to achieve that signature golden hue.
Enter the Air Fryer revolution of the 2010s. This appliance changed the history of the cutlet by allowing home cooks to achieve the Maillard reaction (browning) using rapid air technology rather than submersion in fat. We are essentially taking a centuries-old European tradition and giving it a modern, health-conscious American makeover. It honors the classic texture while fitting perfectly into our busy, modern lifestyles.
Why This Recipe Works
You might be wondering, “Can air really replicate the texture of hot oil?” The short answer is yes, but only if you follow a few scientific principles. The magic of the air fryer lies in its convection mechanism. It circulates superheated air around the food at high speeds. When this hot air hits the breadcrumbs, it evaporates moisture rapidly, creating a crisp texture.
However, the secret to making this specific recipe work is the Panko breadcrumb combined with the oil spray. Traditional breadcrumbs are fine and can sometimes turn soggy or powdery in an air fryer. Panko flakes are larger and airier, providing more surface area for the hot air to grab onto. Furthermore, dry flour and crumbs cannot brown on their own; they need a fat conductor. By spraying the cutlets with a light mist of olive oil before cooking, we mimic the frying process. The oil heats up on the surface of the chicken, frying the crumbs locally while the air circulates, resulting in that GBD (Golden Brown Delicious) finish we all crave.
Why You’ll Love This Recipe
- ✓Ready in under 25 minutes from start to finish.
- ✓Uses a fraction of the oil compared to pan-frying.
- ✓Kid-friendly and perfect for picky eaters.
- ✓Versatile: great for salads, sandwiches, or pasta.
- ✓Zero stovetop splatter cleanup required.
- ✓Meal-prep friendly for easy lunches all week.
Equipment You’ll Need
- ✓Air Fryer (Basket style or Oven style)
- ✓Meat Mallet or Heavy Rolling Pin
- ✓3 Shallow Bowls for dredging
- ✓Tongs
- ✓Plastic Wrap or Parchment Paper
- ✓Oil Sprayer (filled with Olive Oil or Avocado Oil)
Ingredients
- ✓2 large boneless, skinless chicken breasts (approx. 1 lb total)
- ✓1/2 cup all-purpose flour
- ✓2 large eggs, beaten
- ✓1.5 cups Panko breadcrumbs (Japanese style)
- ✓1/4 cup grated Parmesan cheese
- ✓1 teaspoon garlic powder
- ✓1 teaspoon onion powder
- ✓1 teaspoon dried Italian seasoning (oregano/basil blend)
- ✓1/2 teaspoon paprika (for color)
- ✓1 teaspoon kosher salt
- ✓1/2 teaspoon freshly cracked black pepper
- ✓Olive oil spray or Avocado oil spray (essential!)
- ✓Fresh parsley and lemon wedges for serving
Instructions
- Prep the Chicken: Slice the chicken breasts in half horizontally (butterfly style) to create 4 thin cutlets. Place them between two sheets of plastic wrap and gently pound them with a meat mallet until they are an even 1/4-inch thickness. This ensures even cooking!
- Set Up Dredging Station: Get your three shallow bowls ready. In the first bowl, mix the flour with a pinch of salt and pepper. In the second bowl, whisk the eggs until smooth. In the third bowl, combine the Panko breadcrumbs, Parmesan cheese, garlic powder, onion powder, Italian seasoning, paprika, and the remaining salt and pepper.
- Dredge the Cutlets: Working one piece at a time, dip the chicken into the flour (shake off excess), then dip fully into the egg wash (let excess drip off), and finally press firmly into the Panko mixture. Make sure every nook and cranny is coated with those crunchy crumbs.
- Preheat & Spray: Preheat your air fryer to 400°F (200°C) for about 3 minutes. Spray the air fryer basket with oil. Place the breaded cutlets in the basket in a single layer. Do not overlap! You may need to do this in two batches depending on the size of your fryer.
- The Secret Step: Generously spray the top of the chicken cutlets with your oil spray. You want to wet the breadcrumbs slightly—this eliminates dry flour spots and ensures browning.
- Air Fry: Cook at 400°F for 6 minutes. Open the basket, flip the chicken cutlets over, and spray the other side with oil. Cook for another 4-6 minutes until golden brown and the internal temperature reaches 165°F.
- Rest & Serve: Remove the chicken and let it rest on a wire rack for 2-3 minutes (this keeps the bottom from getting soggy). Squeeze fresh lemon juice over the top, garnish with parsley, and serve immediately!
Expert Cooking Tips
- ✓Don’t skip the pounding: Even thickness is key to juicy chicken. If one end is thick and the other thin, you’ll end up with dry meat.
- ✓Press the breading: When coating with Panko, really press the chicken down into the crumbs with your hand to help them adhere.
- ✓Oil is your friend: Even though this is ‘air fried,’ dry breadcrumbs won’t brown without a little fat. Be liberal with your oil spray!
- ✓Single layer only: Never stack the chicken. Air needs to circulate 360 degrees around the food to make it crispy.
- ✓Check the flour: Shake off excess flour. Too much flour under the egg can cause the breading to slide off after cooking.
Substitutions and Variations
We all have those moments where we are missing one ingredient, right? Here is how you can swap things out:
- Gluten-Free: Use a 1:1 Gluten-Free flour blend and GF Panko crumbs. It works perfectly!
- No Eggs? You can actually brush the chicken with a thin layer of mayonnaise or Greek yogurt instead of using an egg wash. It sounds crazy, but it keeps the chicken incredibly moist.
- Cheesy Twist: Swap the Parmesan for Pecorino Romano for a sharper, saltier kick.
- Spice It Up: Add a pinch of cayenne pepper to the flour mixture if your family likes a little heat.
Common Mistakes to Avoid
The biggest mistake people make with air fryer chicken is overcrowding the basket. I know, I know, you want to get dinner done fast! But if the pieces are touching, they will steam instead of crisp, and you will end up with soggy, pale chicken. Cook in batches and keep the first batch warm in a low oven if needed.
Another common pitfall is white spots. If your chicken comes out looking like it has white powdery spots, it means you didn’t spray enough oil on that section. The flour needs to be hydrated by the oil to brown properly.
Serving Suggestions
The beauty of these cutlets is that they go with everything. Here are my favorite ways to serve them:
- The Classic: Serve with a side of mashed potatoes and steamed broccoli.
- Chicken Parm Style: Top the cooked cutlet with marinara sauce and mozzarella, then air fry for 1 more minute to melt the cheese.
- Salad Topper: Slice into strips and place over a Caesar salad or a big chopped salad.
- Sandwich: Put it on a brioche bun with pickles, lettuce, and spicy mayo for a fake-out take-out chicken sandwich.
Storage and Reheating Tips
Fridge: Store leftovers in an airtight container for up to 3 days. To keep them from getting soggy, place a paper towel in the bottom of the container.
Freezer: You can freeze the cooked cutlets! Let them cool completely, then freeze them flat on a baking sheet before transferring to a freezer bag. They last for 2 months.
Reheating: Do NOT microwave these! The microwave will turn them into rubber. Reheat in the air fryer at 375°F for 3-4 minutes until they are crispy and hot again.
Nutrition Facts (Estimated)
| Serving Size | 1 Cutlet |
| Calories | 285 kcal |
| Fat | 9g |
| Saturated Fat | 2g |
| Unsaturated Fat | 6g |
| Trans Fat | 0g |
| Cholesterol | 95mg |
| Sodium | 450mg |
| Carbohydrates | 18g |
| Fiber | 1g |
| Sugar | 1g |
| Protein | 32g |
Frequently Asked Questions
Can I use regular breadcrumbs instead of Panko?
You can, but the texture won’t be as crispy. Regular breadcrumbs create a denser, softer coating. Panko is specifically designed to stay airy and crunchy, which is ideal for air frying.
How do I know when the chicken is done?
The most accurate way is using a meat thermometer. The internal temperature should reach 165°F (74°C). Visually, the juices should run clear and the coating should be a deep golden brown.
Can I make these ahead of time?
You can bread the chicken earlier in the day and keep it in the fridge on a wire rack (uncovered) for up to 4 hours. This actually helps the breading stick better! Just air fry right before dinner.
My breading keeps falling off, help!
This usually happens if the chicken was too wet before dredging. Pat the chicken very dry with paper towels before dipping it in the flour. Also, make sure to shake off excess flour before the egg wash.
Is this recipe Keto-friendly?
As written, no, because of the flour and Panko. However, you can make a Keto version by using almond flour for dredging and crushed pork rinds mixed with parmesan for the breading!
What oil spray is best?
I recommend buying a refillable oil sprayer and filling it with high-quality olive oil or avocado oil. Avoid the aerosol cans like PAM that have propellants, as they can sometimes damage the non-stick coating of your air fryer basket over time.
Can I use chicken thighs?
Absolutely! Boneless, skinless chicken thighs are delicious and juicy. They might take 2-3 minutes longer to cook than breasts, so just keep an eye on that internal temperature.
Why is my chicken dry?
It was likely overcooked. Chicken breast has very little fat, so it goes from juicy to dry very quickly. Because we pounded them thin, they cook fast. Check them at the 10-minute mark.
Conclusion
I truly hope these Crispy Air Fryer Chicken Cutlets make it into your regular dinner rotation! There is something so satisfying about hearing that crunch when you bite into them, knowing you didn’t have to deal with a pot of hot oil. It is the ultimate mom-win: happy kids, happy husband, and a clean kitchen.
If you try this recipe, please snap a photo and tag me on Instagram or leave a comment below! I love seeing your creations and hearing how you served them. Happy cooking, mamas!