Crispy Mexican Shredded Beef Tacos
If you are looking for a dinner win that will have the whole family cheering, look no further. These crispy shredded beef tacos are packed with juicy, flavorful meat and melted cheese, all encased in a crunchy golden shell. It is the ultimate comfort food meal!
20 minutes
8 hours
8 hours 20 minutes
12-15 Tacos
Dinner
Slow Cooker & Pan Fry
Mexican-Inspired
Gluten Free
Hey there, busy mamas! Let’s be real for a second: Taco Tuesday is basically a sacred holiday in our house. But sometimes, the standard ground beef and store-bought hard shells just don’t cut it. You know those days when you are craving something with a little more oomph? Something that tastes like you spent all day slaving over the stove, even though your slow cooker did 90% of the work? That is where these Crispy Mexican Shredded Beef Tacos come in to save the day.
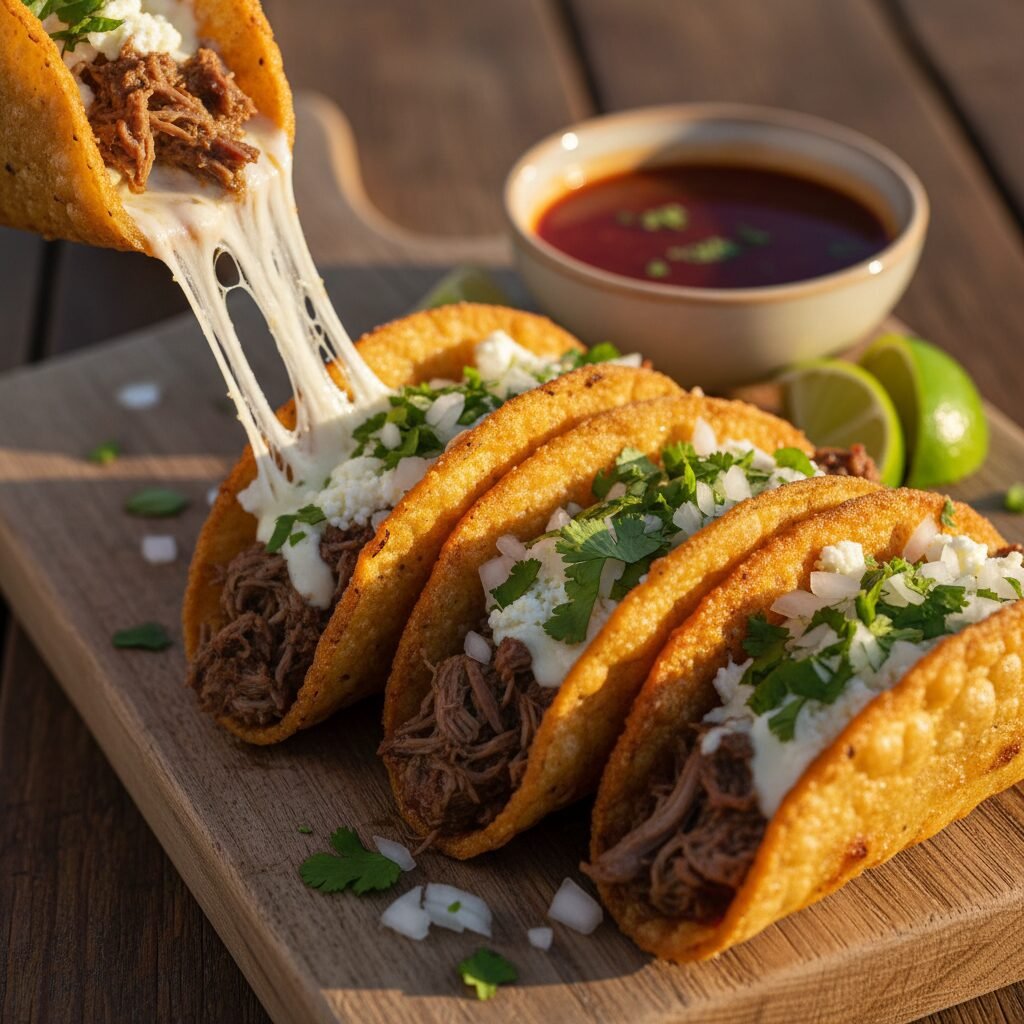
Imagine biting into a taco where the shell shatters perfectly with a satisfying crunch, revealing tender, juicy beef that has been simmering in spices for hours, all held together by a glorious string of melted cheese. It is messy in the best way possible, savory, and honestly, better than any takeout we have had in ages. I call these ‘tacos dorados’ style, where we actually fry the taco with the meat inside. It changes the game entirely!
The best part? This recipe makes a huge batch of shredded beef. I usually make a double batch so I can freeze half for those frantic weeknights when soccer practice runs late and everyone is ‘starving.’ Just pull the meat out, heat it up, fry your tacos, and boom—you are the hero of the dinner table. So, grab your apron (or don’t, no judgment here!), and let’s get cooking!
History & Origins
While many of us grew up with the Americanized version of the hard-shell taco (you know, the yellow box kind), the concept of a fried taco has deep roots in Mexican cuisine. These are often referred to as Tacos Dorados (golden tacos). In Mexico, it is common to fill a soft corn tortilla with meat or potatoes, fold it, and then fry the entire thing until it is crispy.
This method is distinct from the pre-formed hard shells because the tortilla cooks with the filling, allowing the flavors of the fat and juices to permeate the corn dough as it crisps up. It is similar to the popular Quesabirria tacos that have taken the internet by storm recently, where the tortilla is dipped in consommé before frying. Our version is a home-cook-friendly adaptation of these traditional techniques, focusing on ease without sacrificing that authentic, deep-fried flavor profile.
Why This Recipe Works
There is a little bit of culinary science behind why these tacos are so addictive! First, it starts with the Chuck Roast. This cut is rich in collagen and connective tissue. When we slow-cook it, that collagen breaks down into gelatin, keeping the meat incredibly moist and giving it that ‘melt-in-your-mouth’ texture that lean cuts just can’t achieve.
Secondly, the frying technique is crucial. By frying the tortilla with the meat and cheese already inside, we create a steam pocket. The moisture from the beef steams the inside of the tortilla, keeping it slightly chewy, while the hot oil crisps the outside. This creates a dual-texture experience—crunchy on the outside, soft and savory on the inside—that is scientifically proven (okay, maybe just mom-proven) to be delicious. Finally, the Maillard reaction (browning) on the tortilla adds a nutty, toasted corn flavor that pairs perfectly with the acidity of the lime and the richness of the beef.
Why You’ll Love This Recipe
- ✓Freezer-friendly filling perfect for meal prep
- ✓Slow cooker and Instant Pot friendly
- ✓Kid-approved (omit the spicy peppers for little ones!)
- ✓Incredible texture contrast: crispy shell, tender meat
- ✓Budget-friendly using chuck roast
- ✓Great for feeding a crowd
Equipment You’ll Need
- ✓Slow Cooker (or Instant Pot)
- ✓Large Skillet or Cast Iron Pan
- ✓Tongs
- ✓Baking Sheet
- ✓Forks for shredding
- ✓Paper towels
Ingredients
- ✓3-4 lb Beef Chuck Roast (fat trimmed)
- ✓1 tbsp Olive Oil
- ✓1 large White Onion, chopped
- ✓4 cloves Garlic, minced
- ✓1 cup Beef Broth
- ✓1/4 cup Apple Cider Vinegar
- ✓2 tbsp Chili Powder
- ✓1 tbsp Ground Cumin
- ✓1 tbsp Dried Oregano (Mexican oregano if you have it!)
- ✓1 tsp Smoked Paprika
- ✓1 tsp Salt (plus more to taste)
- ✓1/2 tsp Black Pepper
- ✓15-18 Corn Tortillas (White or Yellow)
- ✓2 cups Shredded Monterey Jack or Oaxaca Cheese
- ✓Vegetable Oil or Canola Oil for frying
- ✓Fresh Cilantro and Lime wedges for serving
Instructions
- Sear the Beef: Heat olive oil in a large skillet over medium-high heat. Season your chuck roast generously with salt and pepper. Sear the meat on all sides until it forms a deep brown crust (about 3-4 minutes per side). Do not skip this! It adds so much flavor.
- Prepare the Slow Cooker: Place the chopped onions and minced garlic at the bottom of your slow cooker. Place the seared beef on top.
- Make the Sauce: In a small bowl, whisk together the beef broth, apple cider vinegar, chili powder, cumin, oregano, and smoked paprika. Pour this mixture over the beef.
- Slow Cook: Cover and cook on LOW for 8 hours or HIGH for 4-5 hours. You want the meat to be falling apart when you touch it with a fork.
- Shred the Beef: Remove the beef from the pot and place it in a large bowl. Using two forks, shred the meat completely, discarding any large fatty pieces. Ladle about 1/2 to 1 cup of the cooking liquid (the juices) back into the shredded meat to keep it juicy. Taste and add more salt if needed.
- Prep for Frying: Heat about 1/2 inch of vegetable oil in a large skillet or cast iron pan over medium-high heat. You want the oil hot enough that a tortilla sizzles immediately when dipped.
- Warm Tortillas: Wrap your stack of tortillas in a damp paper towel and microwave for 30-60 seconds. This makes them pliable so they don’t crack when you fold them.
- Assemble and Fry: Place a tortilla into the hot oil. Immediately place a generous pinch of cheese and a scoop of shredded beef on one half of the tortilla. Wait about 10 seconds for the tortilla to soften in the oil, then use tongs to fold the empty half over the filling to create a taco shape.
- Crisp it Up: Fry for about 2 minutes per side, pressing down slightly with the tongs, until the shell is golden brown and crispy. Repeat with remaining tacos (you can usually do 2-3 at a time in a large pan).
- Drain and Serve: Transfer the cooked tacos to a paper towel-lined baking sheet or a wire rack to drain excess oil. Serve immediately with fresh cilantro, onions, salsa, and plenty of lime juice!
Expert Cooking Tips
- ✓Don’t Skip the Sear: Browning the meat before slow cooking locks in flavor and creates a richer sauce.
- ✓Warm Your Tortillas: Cold corn tortillas will crack instantly when you try to fold them. Warming them in the microwave with a damp towel steams them just enough to be flexible.
- ✓Cheese First: Place the cheese on the tortilla before the meat. This acts as a ‘glue’ to hold the taco together and protects the tortilla from getting too soggy from the meat juices.
- ✓Don’t Overcrowd the Pan: Only fry 2 or 3 tacos at a time. If you put too many in, the oil temperature will drop, and your tacos will absorb the oil and become greasy instead of crispy.
- ✓Keep Them Warm: If you are making a big batch, keep the finished tacos on a wire rack in an oven set to 200°F (95°C) while you fry the rest.
Substitutions and Variations
If you aren’t a fan of beef or just want to switch things up, this recipe is super versatile! You can easily swap the chuck roast for boneless skinless chicken thighs (cook time will be less, about 4-6 hours on low) or a pork shoulder for carnitas-style tacos. If you can’t find Oaxaca cheese, Mozzarella or a Mexican blend works perfectly. For a gluten-free option, stick to corn tortillas, but if your kids prefer flour, just know they will crisp up differently—more like a chimichanga texture!
Common Mistakes to Avoid
The biggest mistake people make is using cold tortillas. I cannot stress this enough—if the tortilla isn’t warm and moist, it will snap in half when you fold it in the pan. Another common issue is making the meat too wet. While we want juicy meat, if it is dripping with broth when you put it in the taco, the oil will splatter dangerously, and the shell might get soggy. Use a slotted spoon when filling the tacos!
Serving Suggestions
These tacos are rich, so I love serving them with fresh, acidic sides to cut through the fat. A simple pico de gallo or a spicy salsa verde is a must. For sides, try my Mexican Street Corn Salad (Esquites) or a simple Cilantro Lime Rice. And don’t forget the dipping sauce! You can strain the leftover juices from the slow cooker (the consommé) and serve it in little bowls for dipping—birria style!
Storage and Reheating Tips
Leftovers: If you have leftover assembled tacos, they are best reheated in an air fryer or oven to re-crisp the shell. Microwave will make them rubbery.
Freezing: The cooked shredded beef freezes beautifully! Store the meat in airtight freezer bags with a little bit of the juice for up to 3 months. Thaw in the fridge overnight before using.
Nutrition Facts (Estimated)
| Serving Size | 2 Tacos |
| Calories | 580 |
| Fat | 32g |
| Saturated Fat | 12g |
| Unsaturated Fat | 16g |
| Trans Fat | 0g |
| Cholesterol | 110mg |
| Sodium | 650mg |
| Carbohydrates | 34g |
| Fiber | 4g |
| Sugar | 2g |
| Protein | 38g |
Frequently Asked Questions
Can I make this in an Instant Pot?
Absolutely! Sear the meat using the Sauté function, then add all ingredients. Cook on High Pressure for 45-60 minutes (depending on the size of the roast), followed by a natural release for at least 15 minutes.
Are these tacos spicy?
As written, they are mild to medium. The chili powder adds flavor rather than heat. If you want to make it kid-friendly, ensure your chili powder is mild. To add heat, include a jalapeño or chipotle peppers in adobo sauce to the slow cooker.
Why are my tortillas cracking?
They were likely too cold or dry. Make sure to microwave them in a damp paper towel right before frying. Also, ensure the oil is hot enough so the tortilla starts cooking immediately.
Can I use flour tortillas instead of corn?
You can, but the texture will be different. Flour tortillas tend to bubble up and become flaky rather than crunchy. Corn is traditional for this style of fried taco.
What is the best oil for frying?
Use an oil with a high smoke point and neutral flavor. Vegetable oil, canola oil, or avocado oil are all excellent choices. Avoid olive oil for deep frying.
How do I keep the tacos crispy for a party?
Place a wire rack over a baking sheet and keep the finished tacos in a 200°F oven. This allows air to circulate around them so the bottoms don’t get soggy.
Can I prep this ahead of time?
Yes! You can cook the meat up to 2 days in advance. Store it in the fridge. When you are ready to eat, just reheat the meat slightly (so it is easier to handle) and proceed with the frying step.
What kind of cheese is best?
Oaxaca cheese is the most authentic melting cheese, similar to mozzarella strings. Monterey Jack is a perfect substitute because it melts smoothly and has a mild flavor.
Conclusion
There you have it, friends! The secret to the best taco night ever. I promise, once you try frying your tacos this way, you will never want to go back to the dry, store-bought shells again. It is a labor of love, but seeing the smiles on your family’s faces as they crunch into these golden beauties makes it all worth it. If you try this recipe, please snap a picture and tag me on Instagram or Pinterest—I love seeing your creations! Happy cooking!