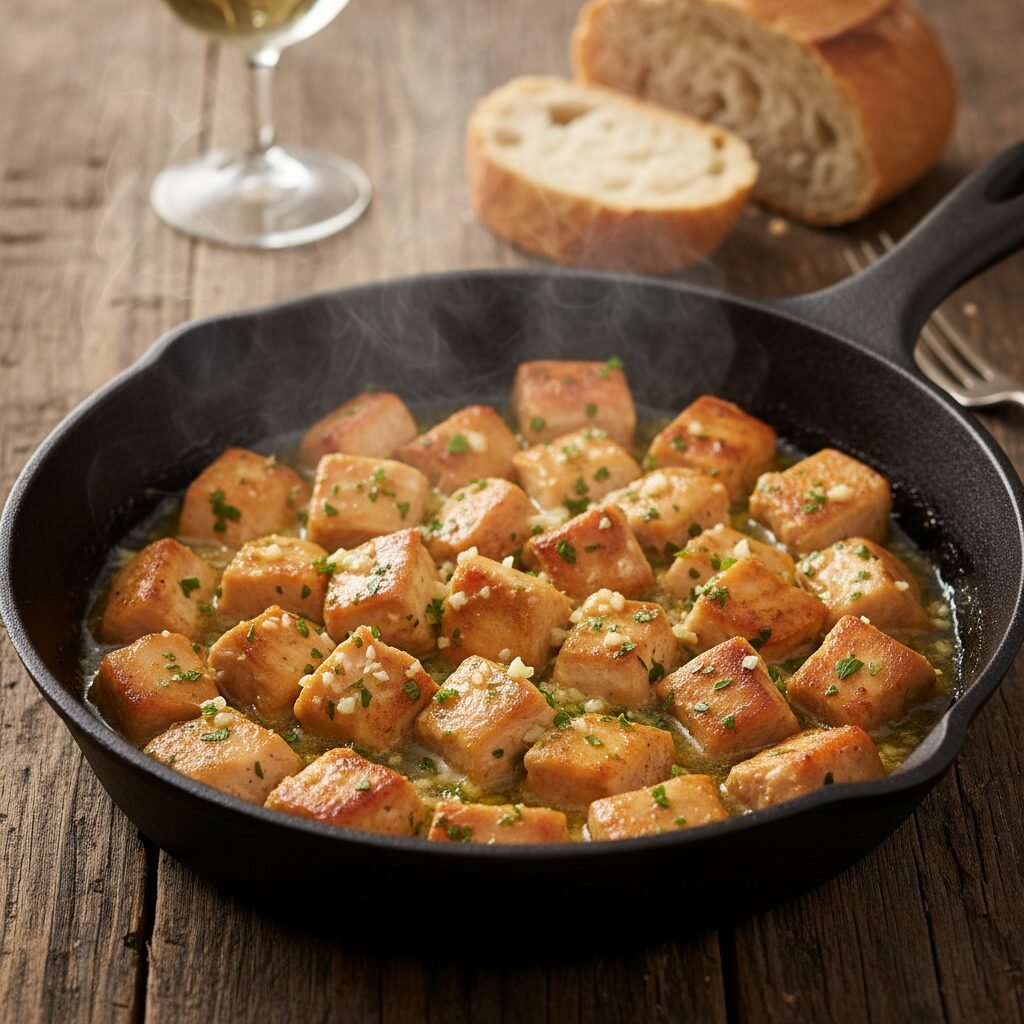
Garlic Butter Chicken
Say hello to your new favorite weeknight savior! These garlic butter chicken bites are seared to golden perfection and drenched in a savory sauce that will have your family licking their plates clean. Best of all, it takes less than 20 minutes from fridge to table.
10 minutes
15 minutes
25 minutes
4 servings
Dinner
Stovetop Sauté
American
Gluten Free
Let’s be real for a second, mama. Between the school runs, the laundry piles that seem to multiply while we sleep, and trying to keep tiny humans alive, dinner often becomes the last thing on our minds until it is suddenly 5:00 PM and everyone is hangry. We have all been there, staring into the fridge hoping a gourmet meal will magically appear. Well, today I am sharing a recipe that is basically magic: Garlic Butter Chicken Bites.
This is one of those recipes that I call a ‘back-pocket hero.’ You know, the kind you can whip up with your eyes closed (though please don’t, safety first!) using ingredients you likely already have in your pantry. There is something profoundly comforting about the smell of garlic sautéing in butter. It instantly makes the house smell like a high-end bistro and tricks everyone into thinking you have been slaving away over a hot stove for hours. In reality? You spent maybe 15 minutes, tops.
My kids absolutely adore these chicken bites. Because we cut the chicken into small cubes, they are fun to eat and cook incredibly fast, which means the meat stays juicy and tender rather than drying out. Plus, that buttery sauce? It is liquid gold. We pour it over rice, mashed potatoes, or even just soak it up with crusty bread. If you are following a low-carb or Keto lifestyle, this recipe fits perfectly into your rotation, pairing beautifully with zucchini noodles or steamed broccoli. So, grab your favorite skillet, and let’s make dinner easy again!
History & Origins
While ‘Garlic Butter Chicken’ feels like a modern American weeknight staple, its roots are deeply planted in classic French culinary techniques. The combination of poultry and compound butters (beurre composé) has been a mainstay in French cooking for centuries. Traditionally, a dish like Poulet Sauté aux Herbes would involve sautéing chicken pieces and finishing them with a knob of butter mixed with fresh herbs and garlic to create a glossy, emulsified pan sauce.
In the mid-20th century, as American home cooks began looking for faster ways to get dinner on the table without sacrificing flavor, the concept of ‘skillet dinners’ exploded. The intricate French sauces were simplified into what we have here: a direct addition of butter and garlic to the hot pan. This specific style of ‘chicken bites’—cubing the meat before cooking—became incredibly popular in the early 2000s with the rise of meal prep culture and the internet’s demand for 20-minute meals. It bridges the gap between a stir-fry technique and a classic roasted chicken flavor profile, offering the best of both worlds.
Why This Recipe Works
You might be wondering, how can something with so few ingredients taste this good? The secret lies in the Maillard reaction and the specific way we layer fats. By cutting the chicken into bite-sized pieces, we maximize the surface area. When we sear these pieces in hot olive oil first, we create a golden-brown crust on multiple sides of the meat. This browning isn’t just for looks; it creates complex savory flavors that boiled or baked chicken simply cannot achieve.
We start with oil because it has a higher smoke point than butter. If we started with butter at high heat, the milk solids would burn and turn bitter before the chicken was cooked. Once the chicken is seared and nearly done, we lower the heat and then add the butter and garlic. This technique, often called ‘mounting’ the sauce, allows the butter to melt gently, creating a creamy, velvety coating rather than a greasy separation. The garlic cooks just enough to lose its raw bite but retains its aromatic punch, infusing the fats with flavor that coats every single nook and cranny of the chicken.
Why You’ll Love This Recipe
- ✓Ready in under 20 minutes
- ✓One-pan cleanup (less dishes!)
- ✓Keto and Low-Carb friendly
- ✓Uses simple pantry staples
- ✓Kid-approved bite-sized pieces
- ✓Versatile for meal prep
Equipment You’ll Need
- ✓Large Cast Iron Skillet or Non-Stick Pan
- ✓Kitchen Tongs
- ✓Sharp Chef’s Knife
- ✓Cutting Board
- ✓Measuring Spoons
Ingredients
- ✓1.5 lbs Boneless Skinless Chicken Breasts (cut into 1-inch cubes)
- ✓1 tablespoon Olive Oil (for searing)
- ✓3 tablespoons Unsalted Butter (divided)
- ✓1 teaspoon Salt (plus more to taste)
- ✓1/2 teaspoon Black Pepper (freshly cracked)
- ✓1 teaspoon Onion Powder
- ✓4 cloves Garlic (minced finely)
- ✓1 tablespoon Fresh Parsley (chopped, for garnish)
- ✓Optional: 1/2 teaspoon Red Chili Flakes (for a kick)
Instructions
- Prep the Chicken: Start by patting your chicken breasts dry with paper towels. This is crucial for a good sear! Cut the chicken into uniform 1-inch bite-sized cubes. Place them in a bowl and toss with salt, pepper, and onion powder until evenly coated.
- Heat the Pan: Place your large skillet over medium-high heat. Add the olive oil and let it get hot—you want it shimmering but not smoking.
- Sear the Chicken: Add the chicken pieces to the skillet in a single layer. Do not crowd the pan; if you put too much in at once, the chicken will steam instead of sear. You may need to do this in two batches. Cook for 3-4 minutes on one side until golden brown, then flip and cook for another 2-3 minutes until cooked through.
- Make the Garlic Butter: Once the chicken is cooked, reduce the heat to low. If you cooked in batches, add all the chicken back to the pan now. Push the chicken slightly to the side and add the butter to the center of the pan. Let it melt.
- Infuse the Flavor: Add the minced garlic into the pool of melting butter. Sauté the garlic for just about 1 minute until it is fragrant—be careful not to burn it! Toss the chicken in the garlic butter mixture until every piece is glossy and coated.
- Garnish and Serve: Remove the pan from the heat immediately. Sprinkle with fresh chopped parsley and red chili flakes if using. Serve hot straight from the skillet!
Expert Cooking Tips
- ✓Dry the Chicken: Moisture is the enemy of browning. Always pat the chicken dry with paper towels before seasoning.
- ✓Room Temp Butter: Use room temperature butter if possible; it melts more evenly into the sauce.
- ✓Fresh Garlic is Best: While jarred garlic is convenient, fresh minced garlic provides a much punchier and sweeter flavor for this simple sauce.
- ✓Don’t Overcook: Chicken breast dries out fast. Since these are small cubes, they cook very quickly. Pull them off the heat as soon as they reach 165°F.
- ✓Cast Iron Love: If you have a cast iron skillet, use it! It retains heat beautifully and gives the best crust on the meat.
Substitutions and Variations
Cooking is all about flexibility, right? If you don’t have chicken breasts on hand, chicken thighs are an excellent substitute and are actually more forgiving if you accidentally overcook them. For a dairy-free version, you can swap the butter for Ghee (clarified butter) or a high-quality vegan butter block. If you are out of fresh parsley, chopped fresh basil or even dried oregano works lovely here. No onion powder? Just skip it or use a little garlic powder instead.
Common Mistakes to Avoid
The biggest mistake I see with this recipe is overcrowding the pan. I know, I know, you just want to get dinner done! But if the chicken pieces are touching, they release water and steam each other, resulting in gray, rubbery meat instead of those golden, crispy bites. Cook in batches if your pan isn’t big enough! Another common mishap is burning the garlic. Garlic turns bitter the second it burns, so make sure you lower the heat before adding it and keep it moving in the pan.
Serving Suggestions
This dish is incredibly versatile! For a classic comfort meal, serve these bites over a bed of creamy mashed potatoes or buttered egg noodles. If you are keeping it low-carb, they are fantastic over cauliflower rice or zucchini noodles (zoodles). I also love serving this with a side of roasted asparagus or steamed green beans to add some color to the plate. The leftover sauce in the pan is perfect for drizzling over the veggies!
Storage and Reheating Tips
To Store: Place any leftovers in an airtight container and refrigerate for up to 3-4 days. It makes for a great lunch the next day!
To Reheat: Microwave can make chicken rubbery. I recommend reheating gently in a skillet over low heat with a splash of chicken broth or water to keep it moist. You can microwave it, but do it in 30-second intervals at 50% power.
To Freeze: You can freeze the cooked chicken for up to 2 months. Thaw overnight in the fridge before reheating.
Nutrition Facts (Estimated)
| Serving Size | 1 cup |
| Calories | 340 |
| Fat | 18g |
| Saturated Fat | 8g |
| Unsaturated Fat | 8g |
| Trans Fat | 0g |
| Cholesterol | 125mg |
| Sodium | 450mg |
| Carbohydrates | 2g |
| Fiber | 0.5g |
| Sugar | 0g |
| Protein | 42g |
Frequently Asked Questions
Can I use chicken thighs instead of breasts?
Absolutely! Boneless, skinless chicken thighs are juicier and have more flavor. They might take an extra minute or two to cook, but they are delicious.
Is this recipe spicy?
Not at all. The black pepper adds a tiny bit of warmth, but without the optional red chili flakes, it is very mild and kid-friendly.
Can I add vegetables to the pan?
Yes! Quick-cooking veggies like bell peppers, zucchini, or mushrooms can be sautéed right alongside the chicken. Just make sure not to crowd the pan too much.
Why is my garlic bitter?
Garlic burns very quickly. Ensure you turn the heat down to low before adding the garlic and butter, and don’t walk away!
Can I make this dairy-free?
Yes, swap the butter for a vegan butter alternative or use extra olive oil. However, real butter gives the most authentic flavor.
Do I have to cut the chicken into cubes?
You don’t have to, but cooking whole breasts takes longer and they often dry out before the center is done. Cubes ensure fast, even cooking and more surface area for the sauce.
What is the best pan to use?
A cast-iron skillet is my favorite for the best sear, but a large stainless steel or non-stick frying pan works perfectly fine too.
Is this recipe Keto friendly?
100%! It is high in protein and healthy fats with virtually zero carbs, making it a staple for Keto dieters.
Conclusion
There you have it, friends! A restaurant-quality dinner that you can pull off in your pajamas in less than 20 minutes. I hope this Garlic Butter Chicken becomes a regular in your meal rotation just like it is in ours. It really saves the day when you are tired but still want to feed your family something wholesome and delicious.
If you try this recipe, please leave a comment below and let me know how it turned out! Did you serve it with pasta or veggies? I love hearing your variations. And don’t forget to Pin this recipe to your ‘Easy Weeknight Dinners’ board so you can find it next time you’re in a pinch. Happy cooking!