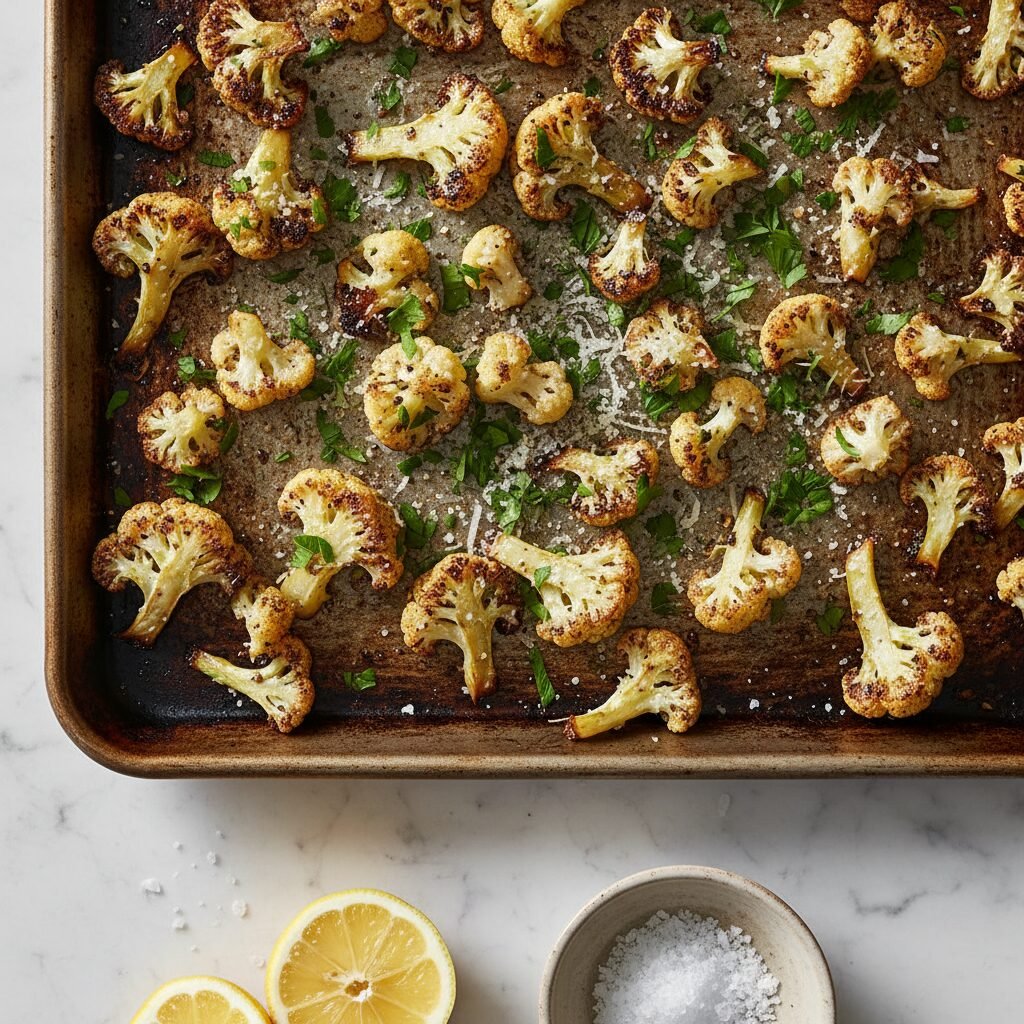
Roasted Cauliflower
Say goodbye to mushy vegetables forever! This roasted cauliflower recipe is my absolute secret weapon for getting the kids to eat their greens (well, whites!). It is crispy, caramelized, nutty, and completely addictive—you might just eat the whole tray straight out of the oven!
10 minutes
25 minutes
35 minutes
4 Servings
Side Dish
Roasting
American / Mediterranean
Vegetarian
Let’s be real for a second—getting the whole family to agree on a vegetable side dish can sometimes feel like negotiating a peace treaty. I used to dread serving cauliflower. Growing up, it was always steamed to a pulp, smelling a bit funky, and drowned in questionable cheese sauce to hide the taste. But let me tell you, when I discovered roasting, it was a total game-changer for my kitchen routine!
If you think you don’t like cauliflower, I am here to gently challenge that notion. When you roast cauliflower at a high temperature, something magical happens. The moisture evaporates, the natural sugars caramelize, and those humble white florets transform into golden, crispy nuggets of joy that taste nutty and sweet. It’s honestly so good that I often catch my husband snacking on it while I’m finishing up dinner.
This recipe is my go-to specifically because it is fuss-free. We are talking about five minutes of prep time, a handful of pantry staples, and an oven doing all the heavy lifting. Whether you are following a Keto diet, looking for a vegan side, or just trying to get more veggies on the table without a fight, this roasted cauliflower is the answer. It pairs with everything from roast chicken to pasta, and it’s elegant enough for a holiday table yet simple enough for a Tuesday night taco bowl.
History & Origins
Believe it or not, cauliflower has a surprisingly rich history that goes way beyond the frozen veggie aisle. This cruciferous vegetable traces its roots back to the Mediterranean region, specifically Cyprus, where it was originally known as "Cyprus Coleworts." It was a staple in ancient Roman cuisine, though it looked quite different from the dense white heads we see at the grocery store today.
For centuries, cauliflower traveled through the Arab world and eventually made its way to Europe. By the time of Louis XIV in France, it was considered a delicacy served at royal banquets! However, for a long time in American cooking during the mid-20th century, cauliflower suffered from the "boil-it-to-death" treatment, which is why so many of us have traumatic childhood memories of soggy, sulfurous veggies.
The roasting revolution really took off in the early 2000s as chefs began to embrace the Maillard reaction—that browning process that creates flavor. Suddenly, cauliflower wasn’t just a side dish; it became the star. In recent years, it has exploded in popularity as the ultimate low-carb shapeshifter, turning into rice, pizza crusts, and even "steaks." But despite all those trendy variations, going back to the basics with simple roasted florets remains the most delicious way to honor this ancient vegetable’s history.
Why This Recipe Works
There is actually some cool science behind why this recipe tastes so much better than steaming or boiling. The secret lies in the heat. By roasting the cauliflower at a high temperature (425°F or 220°C), we are utilizing dry heat to draw moisture out of the vegetable.
As the water evaporates, the cauliflower shrinks slightly and the texture becomes dense and meaty rather than waterlogged. Simultaneously, the high heat triggers the Maillard reaction. This is a chemical reaction between amino acids and reducing sugars that gives browned food its distinctive flavor. It turns the bland, slightly bitter raw cauliflower into something sweet, nutty, and savory.
Another reason this specific method works is the spacing. By ensuring the florets are spread out in a single layer, we allow the hot air to circulate around each piece. If they are too close together, the moisture they release gets trapped and steams the vegetables instead of roasting them. The addition of olive oil not only prevents sticking but also conducts heat evenly to the surface of the cauliflower, ensuring that irresistible golden-brown crust we all crave.
Why You’ll Love This Recipe
- ✓Ready in under 35 minutes
- ✓Naturally Gluten-Free, Vegan, and Keto-friendly
- ✓Uses simple pantry ingredients
- ✓Kid-approved crispy texture
- ✓Minimal cleanup with parchment paper
- ✓Versatile flavor profile adaptable to any cuisine
Equipment You’ll Need
- ✓Large rimmed baking sheet
- ✓Parchment paper or silicone baking mat
- ✓Sharp chef’s knife
- ✓Cutting board
- ✓Large mixing bowl
Ingredients
- ✓1 large head of cauliflower (about 2 lbs)
- ✓3-4 tablespoons extra virgin olive oil
- ✓1 teaspoon garlic powder
- ✓1/2 teaspoon onion powder
- ✓1/2 teaspoon smoked paprika (optional for a smoky kick)
- ✓3/4 teaspoon kosher salt (adjust to taste)
- ✓1/4 teaspoon freshly cracked black pepper
- ✓1/4 cup freshly grated Parmesan cheese (optional)
- ✓1 tablespoon fresh parsley, chopped (for garnish)
- ✓Lemon wedges (for serving)
Instructions
- Preheat and Prep: Preheat your oven to 425°F (220°C). Line a large rimmed baking sheet with parchment paper for easy cleanup. This is a busy mom hack you do not want to skip!
- Cut the Cauliflower: Wash the cauliflower head and pat it thoroughly dry. Remove the outer leaves and the tough stem. Cut the head into bite-sized florets. Try to keep them roughly the same size so they cook evenly. Cut larger florets in half through the stem to create a flat surface for better caramelization.
- Season: Place the florets in a large mixing bowl. Drizzle with the olive oil and sprinkle with garlic powder, onion powder, paprika, salt, and pepper. Toss everything together until every nook and cranny of the cauliflower is well-coated in the oil and spices.
- Arrange: Spread the cauliflower out on the prepared baking sheet. Crucial Step: Ensure they are in a single layer and not touching each other. If your pan is too crowded, use two pans. Crowding leads to soggy veggies!
- Roast: Place in the center of the oven and roast for 20-25 minutes. About halfway through (around the 12-minute mark), give the pan a shake or use a spatula to flip the florets over to ensure even browning.
- Check for Doneness: The cauliflower is done when the edges are crispy and dark golden brown, and a fork easily pierces the stems. If you like them extra charred (like I do!), leave them in for another 3-5 minutes.
- Finish and Serve: Remove from the oven. If using Parmesan cheese, sprinkle it over the hot cauliflower immediately so it melts slightly. Garnish with fresh parsley and a squeeze of fresh lemon juice to brighten the flavors. Serve warm!
Expert Cooking Tips
- ✓Dry it well: After washing your cauliflower, make sure it is completely dry before adding oil. Water creates steam, which is the enemy of crispiness.
- ✓Don’t skimp on oil: Cauliflower is like a sponge. You need enough oil to coat it well, or it will dry out and burn rather than roast.
- ✓Flat side down: For the best caramelization, try to place the cut, flat sides of the florets directly against the baking sheet.
- ✓High heat is key: Do not try to roast at 350°F. You need 400°F to 425°F to get that delicious browning effect.
Substitutions and Variations
One of the best things about this recipe is how flexible it is! If you don’t have olive oil, avocado oil or melted coconut oil works beautifully and adds a high smoke point. For the seasonings, feel free to swap the paprika for curry powder or turmeric for an Indian-inspired twist, or use taco seasoning for a Mexican night side dish.
If you are strictly dairy-free or vegan, simply skip the Parmesan cheese or swap it for nutritional yeast, which gives a fantastic cheesy flavor without the dairy. You can also use frozen cauliflower florets if you are in a pinch, but keep in mind they won’t get quite as crispy as fresh because of the higher water content. Just roast them straight from frozen and add a few minutes to the cooking time.
Common Mistakes to Avoid
The biggest mistake people make is overcrowding the pan. I cannot stress this enough! If the florets are piled on top of each other, they will steam in their own juices and turn out mushy. Always use a large enough sheet pan or split the batch between two pans.
Another common error is undercooking. Don’t be afraid of those dark brown spots! That is where the flavor lives. If you pull them out when they are just pale and soft, you are missing out on the nutty, sweet flavor profile that makes roasted cauliflower so special.
Serving Suggestions
This roasted cauliflower is incredibly versatile. It makes a perfect side dish for roast chicken, steak, or salmon. But don’t stop there! I love tossing these crispy florets into a grain bowl with quinoa and chickpeas for a healthy lunch.
They are also amazing inside tacos—try them with some slaw and avocado crema for a meatless Monday dinner. You can even stir them into your favorite pasta dish or serve them as an appetizer with a side of buffalo sauce or ranch for dipping. My kids actually love them cold in their lunchboxes the next day!
Storage and Reheating Tips
If you happen to have leftovers (which is rare in my house!), store them in an airtight container in the refrigerator for up to 4 days. To reheat, do not use the microwave unless you don’t mind them being soft.
To bring back that crispy texture, pop them back in the oven at 350°F for about 5-10 minutes, or toss them in an air fryer for 3-4 minutes. They freeze okay, but the texture will change significantly upon thawing, so I recommend eating them fresh or from the fridge.
Nutrition Facts (Estimated)
| Serving Size | 1 cup |
| Calories | 110 kcal |
| Fat | 8g |
| Saturated Fat | 1g |
| Unsaturated Fat | 6g |
| Trans Fat | 0g |
| Cholesterol | 0mg |
| Sodium | 280mg |
| Carbohydrates | 8g |
| Fiber | 3g |
| Sugar | 3g |
| Protein | 3g |
Frequently Asked Questions
Why is my roasted cauliflower mushy?
This usually happens for two reasons: either the pan was overcrowded, causing the veggies to steam, or the oven temperature wasn’t high enough. Make sure to give the florets plenty of space and roast at 425°F.
Can I use frozen cauliflower?
Yes, you can! Do not thaw it first. Toss the frozen florets with oil and spices and roast immediately. You may need to add 5-10 minutes to the cooking time. Note that it won’t be quite as crispy as fresh.
Do I eat the stems and core?
Absolutely! The core and stems are delicious and edible. Just peel away the tough outer skin of the main stalk, chop it into cubes, and roast it right alongside the florets. It reduces waste and tastes great.
Is roasted cauliflower healthy?
Very! It is high in fiber, Vitamin C, and Vitamin K, and contains antioxidants. Roasting it with olive oil adds healthy fats, making it a nutritious addition to any meal.
Can I prep this ahead of time?
You can cut the cauliflower into florets a day or two in advance and store them in the fridge. However, wait to toss them with oil and spices until just before you put them in the oven for the best texture.
What spices go well with cauliflower?
Cauliflower is a blank canvas! Aside from garlic and parmesan, try curry powder, cumin, chili powder, lemon pepper, za’atar, or Italian seasoning. It absorbs flavors wonderfully.
How do I cut cauliflower without making a mess?
Turn the cauliflower upside down so the stem is facing you. Cut around the stem to release the large florets first, then break them down into smaller pieces. This creates fewer ‘crumbs’ than cutting through the top of the florets.
Is this recipe Keto-friendly?
Yes, 100%. Cauliflower is a staple in the Keto diet because it is low in net carbs but high in volume and nutrients, making it very filling.
Conclusion
And there you have it, friends! The simplest, most delicious way to eat your veggies. I hope this roasted cauliflower recipe finds its way into your regular dinner rotation just like it has in mine. It is amazing how a little bit of heat and simple seasoning can transform a humble vegetable into something so crave-worthy.
If you try this recipe, please leave a comment below and let me know how it turned out! Did you add any fun spices? Did your kids actually ask for seconds? I love hearing your stories. Don’t forget to pin this to your Healthy Side Dishes board on Pinterest so you can find it easily next time. Happy cooking!