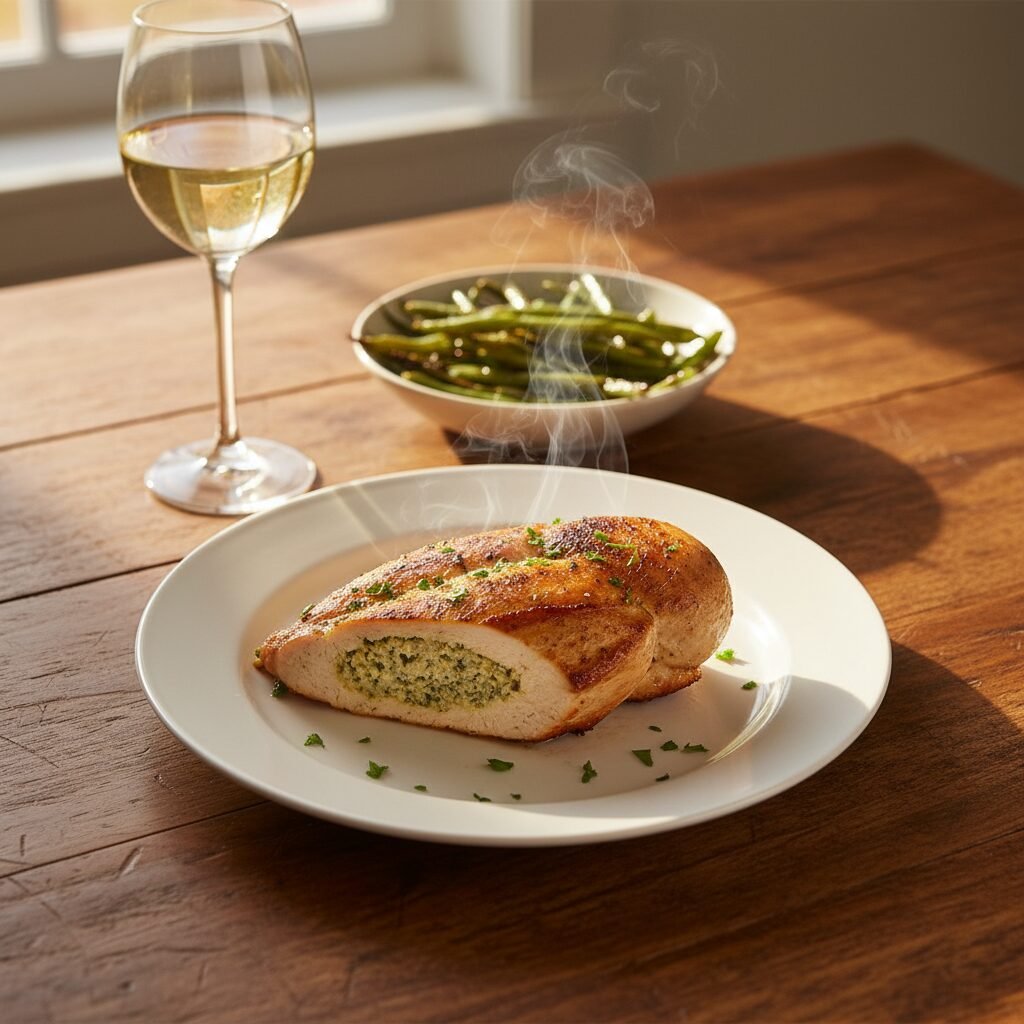
Stuffing Stuffed Chicken Breast
Craving the cozy flavors of Thanksgiving but don’t have hours to spend in the kitchen? This Stuffing Stuffed Chicken Breast recipe is my absolute go-to for turning a plain pack of chicken into a gourmet meal that practically cooks itself.
15 minutes
25 minutes
40 minutes
4 Servings
Main Course
Stovetop / Oven
American
Omnivore
Hey there, beautiful mamas! Let’s be real for a second: we all have those days where the 5:00 PM panic sets in. You know the one—staring into the fridge, seeing a pack of boneless, skinless chicken breasts, and feeling absolutely zero inspiration. We’ve all been there! Chicken is such a staple, but it can get so boring, so fast. And if you overcook it by even a minute? Dry, rubbery disaster that the kiddos will refuse to eat.
That is exactly why I am completely obsessed with this Stuffing Stuffed Chicken Breast recipe. It is a total game-changer, friends! Imagine taking the most comforting part of a holiday meal—that savory, buttery, herb-packed stuffing—and wrapping it inside a juicy, seared chicken breast. It’s like a warm hug on a plate.
Not only does this recipe solve the “dry chicken” dilemma (hello, moisture-locking stuffing!), but it also brings those nostalgic, cozy Sunday dinner vibes to a hectic Tuesday night. My picky eaters gobble this up without a single complaint, and my husband always asks if we’re celebrating something special when I serve it. Best of all? It looks incredibly fancy, like something you’d order at a bistro, but it comes together with pantry staples you probably already have. Let’s get cooking!
History & Origins
Believe it or not, the concept of stuffing meat goes back way further than our grandmother’s Thanksgiving tables. We’re talking ancient history here! The practice of stuffing animals with mixtures of grains, nuts, and herbs can be traced back to the Roman cookbook Apicius, a collection of Roman cookery recipes from the late 4th or early 5th century AD. The Romans knew that stuffing wasn’t just about flavor; it was a way to stretch meat further and keep it incredibly moist during roasting.
Fast forward a few centuries, and “forcemeats” became a staple in European medieval cuisine. The French perfected the galantine and ballotine—deboned meat stuffed and rolled—which are the fancy ancestors of our humble stuffed chicken breast. In America, stuffing (or dressing, depending on where you’re from!) became synonymous with harvest celebrations.
However, the shift from stuffing a whole bird to stuffing individual breasts is a distinctly modern convenience. As busy families moved away from roasting whole chickens on weeknights in the mid-20th century, home cooks needed a way to keep quick-cooking cuts like breast meat juicy and flavorful. Thus, the stuffed breast was born! It combines the elegance of French technique with the heartiness of American comfort food, perfectly adapted for the modern mom on the go.
Why This Recipe Works
You might be wondering, “Why go through the trouble of stuffing the chicken? Why not just serve stuffing on the side?” Great question! There is actually some cool culinary science happening here that makes this dish superior to serving the components separately.
First, let’s talk about moisture retention. Chicken breast is a lean protein, meaning it has very little fat to keep it juicy as it cooks. By cutting a pocket into the meat and filling it with a moist, buttery stuffing mixture, you are essentially basting the chicken from the inside out. As the chicken cooks, the savory steam and fats from the stuffing permeate the meat, preventing it from drying out.
Secondly, we use a two-step cooking method: searing and baking. By searing the chicken in a hot skillet first, we create the Maillard reaction—that beautiful golden-brown crust that adds depth and savory flavor. Finishing it in the oven allows the chicken to cook through gently without burning the outside, ensuring the stuffing reaches a safe temperature right when the chicken is perfectly done. It’s a foolproof method for restaurant-quality results!
Why You’ll Love This Recipe
- ✓Ready in under 45 minutes
- ✓Uses pantry staples
- ✓Kid-friendly flavors
- ✓Looks fancy but is super easy
- ✓Perfect for meal prep
- ✓Prevents dry chicken
Equipment You’ll Need
- ✓Large oven-safe skillet (cast iron is best)
- ✓Sharp chef’s knife
- ✓Meat mallet or rolling pin
- ✓Toothpicks
- ✓Mixing bowl
- ✓Tongs
Ingredients
- ✓4 large boneless, skinless chicken breasts
- ✓1 box (6 oz) Stove Top stuffing mix (or 2 cups homemade stuffing)
- ✓1.5 cups chicken broth (low sodium preferred)
- ✓4 tbsp unsalted butter, divided
- ✓1 tsp garlic powder
- ✓1 tsp onion powder
- ✓1 tsp dried thyme
- ✓1/2 tsp salt
- ✓1/2 tsp black pepper
- ✓1 tbsp olive oil
- ✓Fresh parsley for garnish
Instructions
- Preheat and Prep: Preheat your oven to 375°F (190°C). While the oven heats up, prepare your stuffing. In a saucepan, bring the chicken broth and 2 tablespoons of butter to a boil. Stir in the stuffing mix, cover, remove from heat, and let it stand for 5 minutes. Fluff with a fork and set aside to cool slightly.
- Prepare the Chicken: Pat the chicken breasts dry with paper towels. This is crucial for a good sear! Place the chicken on a cutting board. Using a sharp knife, carefully cut a horizontal slit into the thickest part of each breast to create a deep pocket. Be careful not to cut all the way through to the other side—we want a pocket, not a butterfly.
- Season: In a small bowl, mix the garlic powder, onion powder, thyme, salt, and pepper. Rub this spice mixture all over the outside of the chicken breasts.
- Stuff the Chicken: Take a generous scoop of the prepared stuffing and pack it into the pocket of each chicken breast. Don’t be shy, but try not to overfill it to the point of exploding. Secure the opening with 2-3 toothpicks to keep that delicious goodness inside.
- Sear: Heat the olive oil and the remaining 2 tablespoons of butter in a large oven-safe skillet over medium-high heat. Once the butter is foaming, add the chicken breasts. Sear for about 3-4 minutes per side until they are a beautiful golden brown. We aren’t cooking them through yet, just getting color!
- Bake: Transfer the skillet directly into the preheated oven. Bake for 15-20 minutes, or until the internal temperature of the chicken reaches 165°F (74°C). The stuffing inside should also be hot.
- Rest and Serve: Remove the skillet from the oven (careful, handle is hot!). Let the chicken rest for 5 minutes. This allows the juices to redistribute. Remove the toothpicks before serving and garnish with fresh chopped parsley.
Expert Cooking Tips
- ✓Don’t skip the resting period: Cutting into the chicken immediately will cause all the juices to run out, leaving you with dry meat.
- ✓Toothpick trick: Count how many toothpicks you put in each breast so you know exactly how many to take out before serving!
- ✓Room temperature chicken: Take your chicken out of the fridge 15 minutes before cooking. Cold chicken hitting a hot pan lowers the pan temperature and prevents a good sear.
- ✓Customizing stuffing: Feel free to add sautéed onions, celery, or even dried cranberries to the stuffing mix for extra texture and flavor.
Substitutions and Variations
One of the best things about this recipe is how flexible it is! If you are Gluten-Free, simply swap the standard stuffing mix for a gluten-free bread cube alternative or a rice-based stuffing. If you want to cut down on dairy, you can use olive oil instead of butter.
Not a fan of boxed stuffing? No problem! You can use leftover homemade stuffing, or even a mixture of spinach, artichoke, and cream cheese for a different vibe. If you don’t have chicken broth, vegetable broth works just fine. And for the herbs, feel free to use fresh sage or rosemary if you have them growing in your garden—just use three times the amount of fresh herbs compared to dried.
Common Mistakes to Avoid
The biggest mistake people make with stuffed chicken is overcooking it. Because the chicken is thicker due to the stuffing, it can be tricky to judge doneness by touch. Always use a meat thermometer! Another common issue is cutting the pocket too shallow or cutting all the way through. You want a deep pocket so the stuffing stays put. Lastly, don’t forget to secure with toothpicks; otherwise, your beautiful stuffing will leak out into the pan and burn while the chicken cooks.
Serving Suggestions
Since this dish is practically a meal in itself with the protein and the bread, I love serving it with lighter sides to balance it out. A crisp green salad with a vinaigrette cuts through the richness beautifully. Roasted green beans or garlic parmesan asparagus are also fantastic choices. If you want to go full comfort-food mode, you can’t go wrong with a side of creamy mashed potatoes and a little gravy poured over everything. And for dessert? A simple apple crisp is the perfect finish!
Storage and Reheating Tips
Refrigerator: Store leftovers in an airtight container in the fridge for up to 3 days. Reheat gently in the oven or microwave, adding a splash of broth if it looks a little dry.
Freezer: You can freeze the cooked chicken breasts. Wrap each one individually in plastic wrap and then foil. They will last for up to 2 months. Thaw overnight in the fridge before reheating.
Make Ahead: You can stuff the raw chicken breasts earlier in the day and keep them covered in the fridge. When you’re ready to eat, just sear and bake!
Nutrition Facts (Estimated)
| Serving Size | 1 Stuffed Breast |
| Calories | 485 kcal |
| Fat | 22g |
| Saturated Fat | 10g |
| Unsaturated Fat | 10g |
| Trans Fat | 0g |
| Cholesterol | 145mg |
| Sodium | 850mg |
| Carbohydrates | 24g |
| Fiber | 1g |
| Sugar | 3g |
| Protein | 42g |
Frequently Asked Questions
Can I use raw stuffing inside the chicken?
I don’t recommend it. Because the chicken cooks relatively quickly, raw stuffing (especially if it contains egg) might not reach a safe temperature before the chicken is overcooked. Always use cooked or pre-hydrated stuffing.
How do I know when the chicken is done?
The only foolproof way is to use a digital meat thermometer. Insert it into the thickest part of the meat (avoiding the stuffing if possible, though the stuffing also needs to be hot). The chicken should read 165°F.
Can I make this in an air fryer?
Yes! Preheat your air fryer to 375°F. Spray the stuffed breasts with oil and cook for about 18-22 minutes, flipping halfway through, until they reach 165°F.
My chicken breasts are huge, what should I do?
If your chicken breasts are very large or thick, I recommend pounding them slightly to an even thickness before cutting the pocket, or simply increasing the baking time by 5-10 minutes.
Do I have to use toothpicks?
Toothpicks are the easiest way to keep the stuffing inside, but you can also use kitchen twine to tie the breast shut if you prefer.
Can I use cheese in the stuffing?
Absolutely! Adding mozzarella, cheddar, or parmesan to the stuffing mix adds a delicious gooey texture. Just be sure to seal the chicken well so the cheese doesn’t leak out.
Is this recipe spicy?
Not at all! It’s very savory and herb-forward. If you want a kick, you could add a pinch of red pepper flakes to the spice rub.
What if I don’t have an oven-safe skillet?
No worries! Sear the chicken in your regular frying pan, then transfer the breasts to a greased baking dish to finish cooking in the oven.
Conclusion
And there you have it, friends! A dinner that looks like you spent hours slaving over the stove, but actually let you sip a glass of wine while the oven did the work. This Stuffing Stuffed Chicken Breast is truly a lifesaver for busy weeks and brings so much joy to the table. I hope your family loves it as much as mine does!
If you try this recipe, please leave a comment below or tag me on Pinterest! I love seeing your creations. Happy cooking, mamas!